
We had a redditor bring in his V3 to the depot for repairs. The printer would not level correctly and was useless for over a month.
Shameless self plug, we offer maintenance and materials contracts for printers as well as free depot repairs.
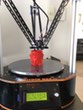
We looked into the issue before starting work and found a lot of ideas and no solutions, please point to posts if you have found others who have solved this issue: (http://forum.seemecnc.com/search.php?ke ... d+leveling) After walking through some test prints (see photos) we identified several issues with the build and found a solution for the probing issue which was repeatable on our V3 (after breaking it intentionally a bit).
Beginner level video instructions on how to correct this: https://www.youtube.com/watch?v=DxGT18rDKUM
The following 3 Items seem to have cleared up the issue:
#1 Added a Ferrite bead on both ends of accelerometer wires, at the HE280 and at the Rambo (See photos)
#2 Wiring to HE280 plug, removed, cut wire ends flush and pressed them in properly this was for the power and probe wires.
#3 Ran the V3 Probing code repeatedly until the first probe attempt doesn't crash at the X tower. This we found needs to be all of the time. If you get a crash when running the probing code, let it finish and then run it again until it runs the first tower without crashing (generally 2-3 iterations).
* We ran the probe with the bed and nozzle heated not cold. Heaters were killed just prior to probing.
**We saw no difference in probe results or first layer results with 0 3 or 6 bed clips. It didn't seem to change the bed shape. Obviously over time having pressure points on heated glass will warp the glass slightly so it be a good idea to tape the bed in place if you are concerned.
If you have questions/comments/internet hate let me know.
FLIR Photos taken to check wiring/board/motor/cooling temps: http://imgur.com/a/vArhl
If you landed here because of a similar issue, check the following items as well. It may help.
1. Fixed the black heater wire leading to the rambo: wire was (loose) (Assembly error)
2. Moved EZR feed gear: EZR extruder gear was to far in towards the motor.
3. Replaced PFTE Tube: PFTE tube had too much friction (Parts Issue)
4. Added a Ferrite bead on both ends of accelerometer wires See photos
5. Wiring to HE280 plug, removed, cut wire ends flush and pressed them in properly.
6. Advised that printing on Tape or PVA will prevent the warping/curling issues experienced.
7. Advised that PID Tuning would help prints.
8. Ran the V3 Probing code repeatedly until the first probe attempt doesn't crash at the X tower.
Results Reported by ComJak:
**** Development Tests for new firmware ****ComJak wrote:4 days later and the printer is still producing quality first layers. Now I'm just optimizing retracts and stuff.
But yes, in terms of the issues that I had with unlevel nozzle heights, the printer is performing 100%.
Huge thank you to miaviator for taking the time to help out. Guy clearly knows his stuff.
PartDaddy wrote:*** proceed with caution here *** This is work in progress. You should keep in mind that you might need to return to the master if this causes your printer to not work. Remember to clear EEPROM if uploading this. AND clear EEPROM before returning to the master or installing a the new master firmware after we commit the final revisions.
This is only tested on a handful of RMAX's and Eris (Erii ?) TODAY at SeeMeCNC. But why not share the bleeding edge.
The development (dev) branch on github updated tonight regarding probing: USE ONLY G29 to calibrate the printer. G29 does it all !! You don't execute anything else. Please post some feedback while we continue to further improve the firmware. After years of wanting a dedicated embedded programmer in-house, I brought on Ryan Rittenhouse, who's very good at what he does.
seemecnc_repetier0922-DEVelopment.JPG

