Updated to v1.8. Added a change log as well.
http://www.geneb.org/rostock-max/rostoc ... manual.pdf
g.
[NEW! 12Feb14] Rostock MAX Assembly Manual
Re: Rostock MAX Assembly Manual
Delta Power!
Defeat the Cartesian Agenda!
http://www.f15sim.com - 80-0007, The only one of its kind.
http://geneb.simpits.org - Technical and Simulator Projects
Defeat the Cartesian Agenda!
http://www.f15sim.com - 80-0007, The only one of its kind.
http://geneb.simpits.org - Technical and Simulator Projects

Re: Rostock MAX Assembly Manual
It's probably also worth mentioning that it's a lot easier to push the twisted end stop wires through the rails if you do it before installing the upper idler bearings or belts so they're not in the way.
- dan
- dan

Re: Rostock MAX Assembly Manual
Looks like you updated it to 1.9 Jan 30th, 13. My Max kit arrives today so I'll be working with this guide. Thanks!
Cheers,
Michael
Cheers,
Michael
Sublime Layers - my blog on Musings and Experiments in 3D Printing Technology and Art
Start Here:
A Strategy for Successful (and Great) Prints
Strategies for Resolving Print Artifacts
The Eclectic Angler
Re: Rostock MAX Assembly Manual
Dan, I'd agree it's easier, but I'm trying to keep the mechanical assembly separated as much as possible from the electrical. Twisting the wires instead of using fishing line makes the task (even post final-assembly) much easier regardless. Thanks for that tip!
g.
g.
Delta Power!
Defeat the Cartesian Agenda!
http://www.f15sim.com - 80-0007, The only one of its kind.
http://geneb.simpits.org - Technical and Simulator Projects
Defeat the Cartesian Agenda!
http://www.f15sim.com - 80-0007, The only one of its kind.
http://geneb.simpits.org - Technical and Simulator Projects
Parts List
My Max had no parts list in the box. I poked around the SeeMeCNC site and searched here and could not find one. Google turned up the RepRap pages for it: http://reprap.org/wiki/Rostock_MAX
It would be helpful to put this link and maybe others in the assembly guide as additional resources. The YouTube videos come to mind.
thanks,
Michael
It would be helpful to put this link and maybe others in the assembly guide as additional resources. The YouTube videos come to mind.
thanks,
Michael
Sublime Layers - my blog on Musings and Experiments in 3D Printing Technology and Art
Start Here:
A Strategy for Successful (and Great) Prints
Strategies for Resolving Print Artifacts
The Eclectic Angler
Re: Rostock MAX Assembly Manual
On page 85, you said "Turning the screw “out” will increase their decrease from the table, turning them “in” will increase it. "
I think you meant to say "Turning the screws “out” will decrease their distance from the table, turning them “in” will increase it."
- dan
I think you meant to say "Turning the screws “out” will decrease their distance from the table, turning them “in” will increase it."
- dan
Re: Rostock MAX Assembly Manual
Well THAT's embarassing. 
g.
g.
Delta Power!
Defeat the Cartesian Agenda!
http://www.f15sim.com - 80-0007, The only one of its kind.
http://geneb.simpits.org - Technical and Simulator Projects
Defeat the Cartesian Agenda!
http://www.f15sim.com - 80-0007, The only one of its kind.
http://geneb.simpits.org - Technical and Simulator Projects
Re: Rostock MAX Assembly Manual
For the European (220V) people out there, it would be great to add a FAT warning on page 20, that one must switch to the 230V operation mode using the tiny switch right at the power connector. I did recognise it when putting it into place that the default is set to 110V.
-
WookieeGunner
- Plasticator
- Posts: 6
- Joined: Mon Dec 03, 2012 10:59 am
Re: Rostock MAX Assembly Manual
You might want to make a small FYI not to mount the axis servos so the cabling is toward the center of the printer. I mounted the x-axis servo so the wires were pointing outward and had to swap it. The little extra wiring I got from pointing outside to inside was enough to make the door go from "can barely fit my hand in to unplug it" to "opens almost the entire way."
Re: Rostock MAX Assembly Manual
Hi,
In 1.9 documentation, figure 7 and 8 seem to be wrong. 9 is OK.
Kind regards,
Albert
In 1.9 documentation, figure 7 and 8 seem to be wrong. 9 is OK.
Kind regards,
Albert
Re: Rostock MAX Assembly Manual
How are they wrong? Both photos match the figure descriptions.
g.
g.
Delta Power!
Defeat the Cartesian Agenda!
http://www.f15sim.com - 80-0007, The only one of its kind.
http://geneb.simpits.org - Technical and Simulator Projects
Defeat the Cartesian Agenda!
http://www.f15sim.com - 80-0007, The only one of its kind.
http://geneb.simpits.org - Technical and Simulator Projects
Re: Rostock MAX Assembly Manual
Gene, the photos are the right photos, but they show the parts assembled wrong. I mentioned that here on 3 January. You said you'd fix it, but I guess you got distracted by your printer. Perfectly understandable.
- dan
- dan
Re: Rostock MAX Assembly Manual
Ah, ok. Now I get it. When you've got a dozen balls in the air, something is bound to get dropped.
Unfortunately, I really can't correct the photos as I'm not going to tear my machine apart to take pics of the parts. I'll make a note in the text though. Thanks and sorry for the oversight!
g.
Unfortunately, I really can't correct the photos as I'm not going to tear my machine apart to take pics of the parts.
g.
Delta Power!
Defeat the Cartesian Agenda!
http://www.f15sim.com - 80-0007, The only one of its kind.
http://geneb.simpits.org - Technical and Simulator Projects
Defeat the Cartesian Agenda!
http://www.f15sim.com - 80-0007, The only one of its kind.
http://geneb.simpits.org - Technical and Simulator Projects
Re: Rostock MAX Assembly Manual
Version 1.12 is now available.
This update covers positioning of the LCD and electronics doors in order to avoid problems with the future installation of a second extruder.
g.
This update covers positioning of the LCD and electronics doors in order to avoid problems with the future installation of a second extruder.
g.
Delta Power!
Defeat the Cartesian Agenda!
http://www.f15sim.com - 80-0007, The only one of its kind.
http://geneb.simpits.org - Technical and Simulator Projects
Defeat the Cartesian Agenda!
http://www.f15sim.com - 80-0007, The only one of its kind.
http://geneb.simpits.org - Technical and Simulator Projects
-
MorbidSlowBurn

- Printmaster!
- Posts: 169
- Joined: Sun Mar 03, 2013 5:33 pm
Re: Rostock MAX Assembly Manual
Geneb,
Your manual was invaluable with assembling the Rostock. I assembled an Acrylic version using your instructions and the only difference was that I had to actually drill the countersinks as I couldn't "pop out the rings". The rings were there as a guide to let me know which side and when to stop drilling.
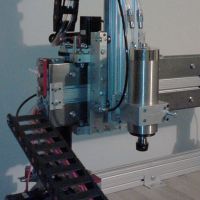
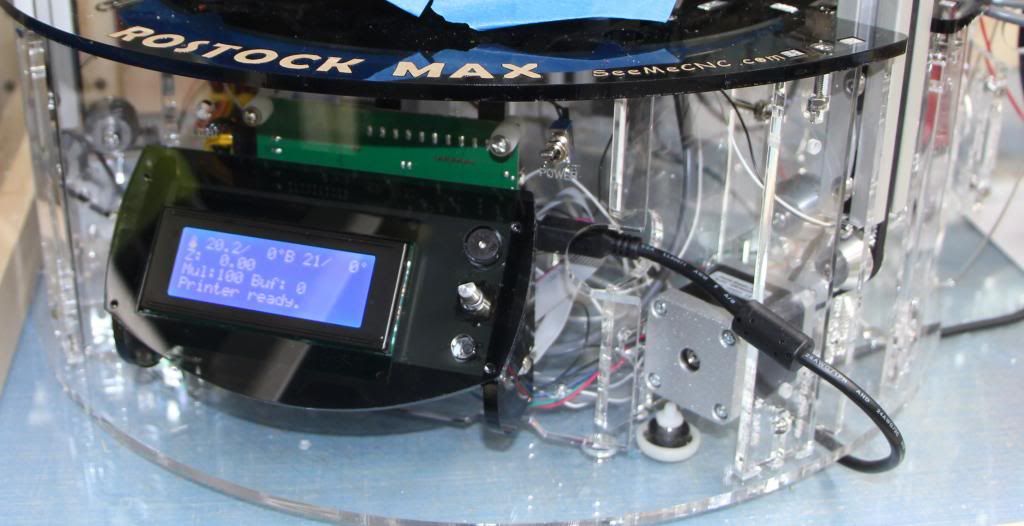
Also not sure if the Acrylic cut file is different but you can see in the attached photos that I was able to mount the Rambo Board directly behind the LCD screen between the X and Y axis without modification. Allows me to access all the electronics without having to remove the extruders.
Feel free to use the images as you see fit. Also since mine is "see through" if there are any pictures you want of it assembled let me know.
[img]http://i1299.photobucket.com/albums/ag6 ... 99787b.jpg[/img]
[img]http://i1299.photobucket.com/albums/ag6 ... 93b78f.jpg[/img]
Your manual was invaluable with assembling the Rostock. I assembled an Acrylic version using your instructions and the only difference was that I had to actually drill the countersinks as I couldn't "pop out the rings". The rings were there as a guide to let me know which side and when to stop drilling.
Also not sure if the Acrylic cut file is different but you can see in the attached photos that I was able to mount the Rambo Board directly behind the LCD screen between the X and Y axis without modification. Allows me to access all the electronics without having to remove the extruders.
Feel free to use the images as you see fit. Also since mine is "see through" if there are any pictures you want of it assembled let me know.
[img]http://i1299.photobucket.com/albums/ag6 ... 99787b.jpg[/img]
[img]http://i1299.photobucket.com/albums/ag6 ... 93b78f.jpg[/img]
Re: Rostock MAX Assembly Manual
MorbidSlowBurn, how long did it take you to completely assemble and calibrate your machine?
My rostock build log http://forum.seemecnc.com/viewtopic.php?f=42&t=1228
-
MorbidSlowBurn
- Printmaster!
- Posts: 169
- Joined: Sun Mar 03, 2013 5:33 pm
Re: Rostock MAX Assembly Manual
I took me about three days to assembly so close to 16 hours including LCD assembly and all wiring. Not including enclosure.
Still not finished completely calibrating as I want to improve print quality. But (not including print time) about 3 hours to calibrate with making adjustments to the firmware. I have to say without this forum I would still be calibrating. My biggest challenge was I have a 16 microstep Rambo so I was only getting about half travel when I used a copy of the Marlin firmware I downloaded, again found the solution quickly on this forum. This is my first 3D printer so learning everything as I go. My mechanical engineering background only helped with the assembly not the programing.
If you have more questions I prefer not to hijack the thread so ask away in my enclosure post http://forum.seemecnc.com/viewtopic.php ... 1249#p6226
-
MorbidSlowBurn
- Printmaster!
- Posts: 169
- Joined: Sun Mar 03, 2013 5:33 pm
Re: Rostock MAX Assembly Manual
Forgot to mention. If someone does get the acrylic version. I recommend countersinking the ringed holes before removing the backing paper. Otherwise the shavings will stick to the plastic via static. Just tough to clean.
Re: Rostock MAX Assembly Manual
The images aren't appearing.
g.
g.
Delta Power!
Defeat the Cartesian Agenda!
http://www.f15sim.com - 80-0007, The only one of its kind.
http://geneb.simpits.org - Technical and Simulator Projects
Defeat the Cartesian Agenda!
http://www.f15sim.com - 80-0007, The only one of its kind.
http://geneb.simpits.org - Technical and Simulator Projects

Re: Rostock MAX Assembly Manual
Main manual site not responding for anyone else?
"Now you see why evil will always triumph! Because good is dumb." - Spaceballs
-
MorbidSlowBurn
- Printmaster!
- Posts: 169
- Joined: Sun Mar 03, 2013 5:33 pm
Re: Rostock MAX Assembly Manual
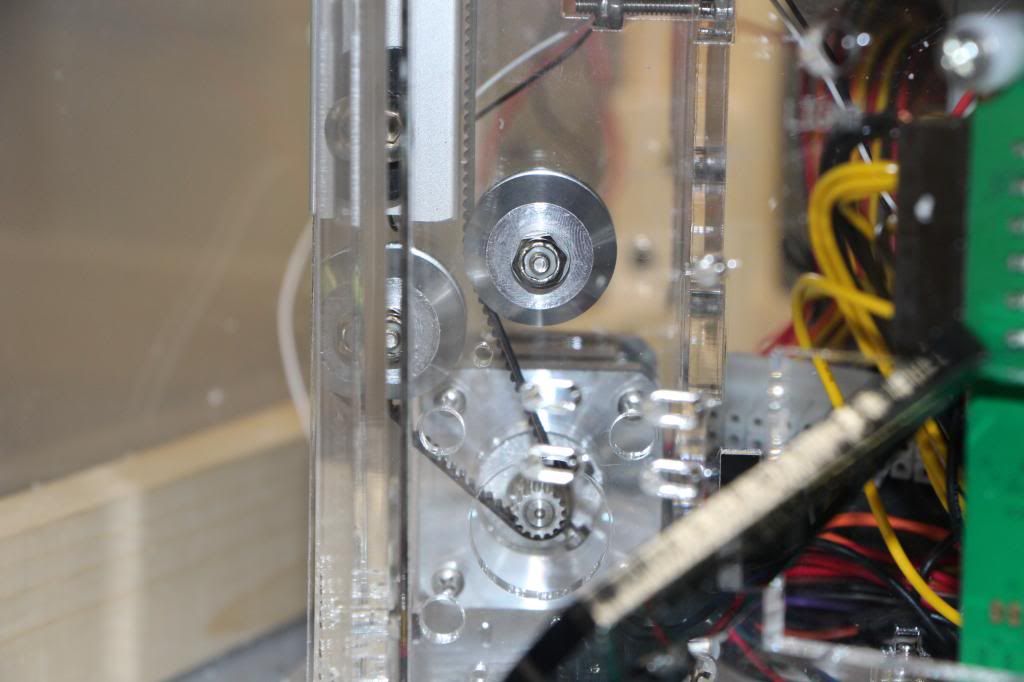
Sorry. Reorganized my photos. Forgot to update the links. I also attached a belt path photo.
[img]http://i1299.photobucket.com/albums/ag6 ... 99787b.jpg[/img]
[img]http://i1299.photobucket.com/albums/ag6 ... 93b78f.jpg[/img]
[img]http://i1299.photobucket.com/albums/ag6 ... e00bad.jpg[/img]
[img]http://i1299.photobucket.com/albums/ag6 ... 99787b.jpg[/img]
[img]http://i1299.photobucket.com/albums/ag6 ... 93b78f.jpg[/img]
[img]http://i1299.photobucket.com/albums/ag6 ... e00bad.jpg[/img]
Re: Rostock MAX Assembly Manual
Wow, the acrylic version is just stunning, makes me wish I had sprung the extra for it.
Nice clear pics as well thanks!
Nice clear pics as well thanks!
"Now you see why evil will always triumph! Because good is dumb." - Spaceballs
Re: Rostock MAX Assembly Manual
The acrylic is fantastic for showing off the machine and neat details like the belt path.
It will drive you out of your mind for daily use. My understanding is that it cracks easily.
The machine hosting the docs went loopy yesterday and I wasn't able to get my wife to reboot it until later in the morning.
g.
It will drive you out of your mind for daily use. My understanding is that it cracks easily.
The machine hosting the docs went loopy yesterday and I wasn't able to get my wife to reboot it until later in the morning.
g.
Delta Power!
Defeat the Cartesian Agenda!
http://www.f15sim.com - 80-0007, The only one of its kind.
http://geneb.simpits.org - Technical and Simulator Projects
Defeat the Cartesian Agenda!
http://www.f15sim.com - 80-0007, The only one of its kind.
http://geneb.simpits.org - Technical and Simulator Projects
-
MorbidSlowBurn
- Printmaster!
- Posts: 169
- Joined: Sun Mar 03, 2013 5:33 pm
Re: Rostock MAX Assembly Manual
I will warn the acrylic can crack. Two places by my doing  I overtightened a couple of pieces. On my dual extruder mount the one side piece appeared to have shifted during cutting. I still assembled without fixing the holes and wound up craking a spacer. Not a critical area but still frustrating. Basically do not use the screws to pull the pieces together or it will crack.