I'm struggling a little here...
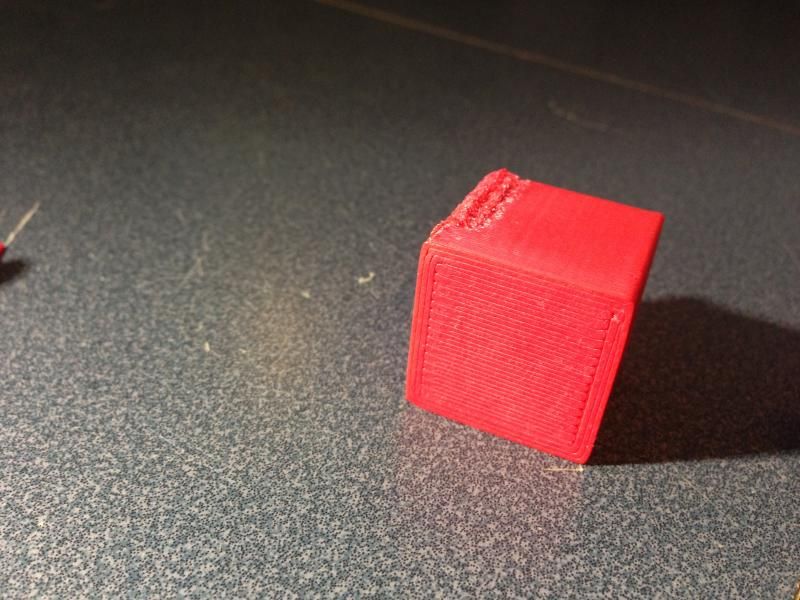
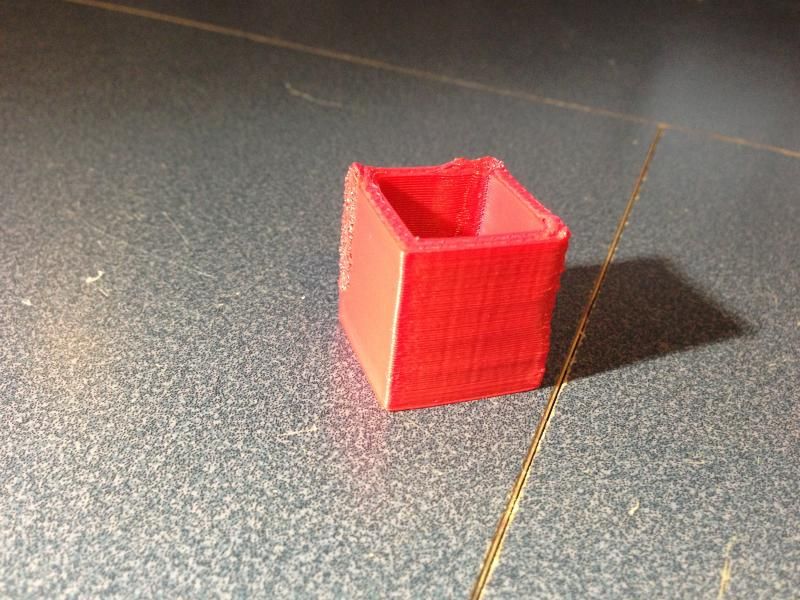
I was hoping to post some pictures up and get some feedback. All of these are done with the same settings, using ABS.
It appears to be spot on sometimes and off others. It's also always accurate close to the bed
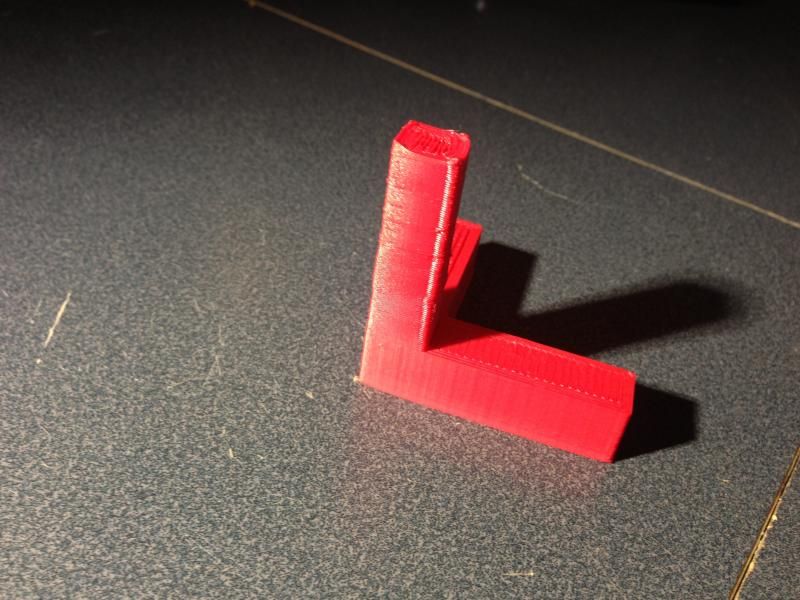
That right angle part was doing great, then when it started on the vertical part it failed...
Here is a link to the rest of the pictures if you want to see more.
http://smg.photobucket.com/user/6bolt2g ... ing?page=1
Thanks in advance for the help guys!
[img]http://img.photobucket.com/albums/v737/ ... 370f87.jpg[/img]
[img]http://img.photobucket.com/albums/v737/ ... ee69a0.jpg[/img]
[img]http://img.photobucket.com/albums/v737/ ... a4d9ee.jpg[/img]
Delta Arm Blues?
Delta Arm Blues?
"like, right now, 3D printing is in the DOS stages with the big black floppy disk OS"

Re: Delta Arm Blues?
I'd say you have other issues. Delta arms may be an issue but it isn't obvious from these parts, they look pretty good from that perspective in fact. To me, it looksmore like an extruder/plastic flow problem firstly. Maybe too much filament and/or too hot. How fast are you printing. We suggest slooooowwwwing down to 10mm/s and starting with the .5mm wall calibration thing. Get that right first.
That tall section on the L looks more like a cooling issue. You likely need a fan pointed at the part to cool it so heat doesn't build up and keep that section soft. The bottom part of the L looks great.
That tall section on the L looks more like a cooling issue. You likely need a fan pointed at the part to cool it so heat doesn't build up and keep that section soft. The bottom part of the L looks great.
Sublime Layers - my blog on Musings and Experiments in 3D Printing Technology and Art
Start Here:
A Strategy for Successful (and Great) Prints
Strategies for Resolving Print Artifacts
The Eclectic Angler
Re: Delta Arm Blues?
First off thanks for the reply.mhackney wrote:I'd say you have other issues. Delta arms may be an issue but it isn't obvious from these parts, they look pretty good from that perspective in fact. To me, it looksmore like an extruder/plastic flow problem firstly. Maybe too much filament and/or too hot. How fast are you printing. We suggest slooooowwwwing down to 10mm/s and starting with the .5mm wall calibration thing. Get that right first.
That tall section on the L looks more like a cooling issue. You likely need a fan pointed at the part to cool it so heat doesn't build up and keep that section soft. The bottom part of the L looks great.
I went ahead and took the arms off to check for tightness, and I found 4 arms that I thought were too tight. When I was assembling the printer, I wanted to error on the side of being too tight vs. too loose and sloppy... I figured I could always come back and remove more material to make them looser if need be...
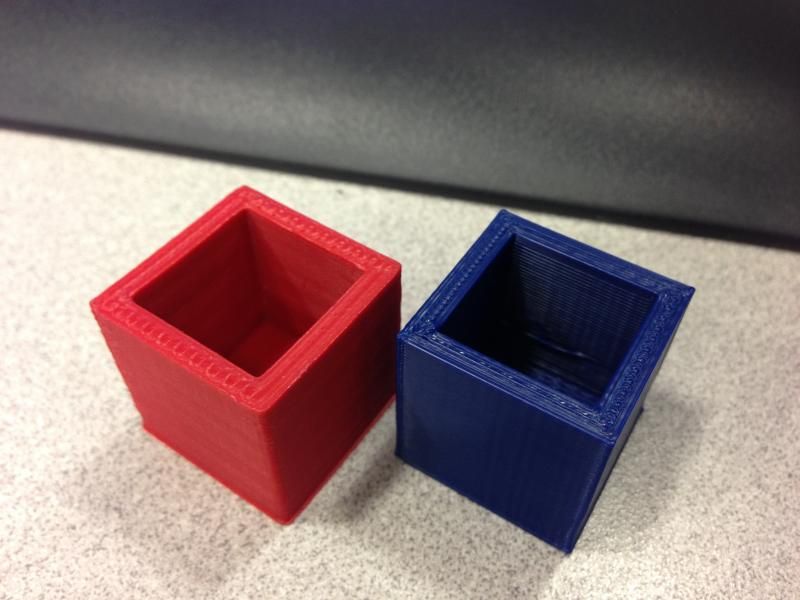
I printed another part with same settings, and its substantially better. Here are a few pictures compared to the Makerbot we have at work (mine is in the red, Makerbot in blue, both using 1.75 ABS)
[img]http://img.photobucket.com/albums/v737/ ... 8889bf.jpg[/img]
[img]http://img.photobucket.com/albums/v737/ ... 029104.jpg[/img]
I'm still struggling with L part, or any vertical structure for that matter. I'm going to play with the speed and temp settings. Right now I'm using exactly whats specified in the Rostock assembly manual.
Thanks again!
"like, right now, 3D printing is in the DOS stages with the big black floppy disk OS"
-
MorbidSlowBurn

- Printmaster!
- Posts: 169
- Joined: Sun Mar 03, 2013 5:33 pm
Re: Delta Arm Blues?
They look pretty good. If you are still having problems with the " L" vertical you may want to take mhackney's advice on a fan. You could also slow your speed down. Either method has advantages and disadvantages. On thin tall structures, especially solid ones, heat builds up in the parts and the layer doesn't have time to set before the next layer is printed. This begins by distorting the part and can ultimately lead to the part falling over.
Another solution is to print 2 parts. This doubles the amount of time to print each layer which can give sufficient time to set.
Another solution is to print 2 parts. This doubles the amount of time to print each layer which can give sufficient time to set.
Re: Delta Arm Blues?
Printing two parts is a great idea! It makes a lot of sense.
I can't wait to try that.... I might have to sneak out of work to run home and try it!
I can't wait to try that.... I might have to sneak out of work to run home and try it!
"like, right now, 3D printing is in the DOS stages with the big black floppy disk OS"

Re: Delta Arm Blues?
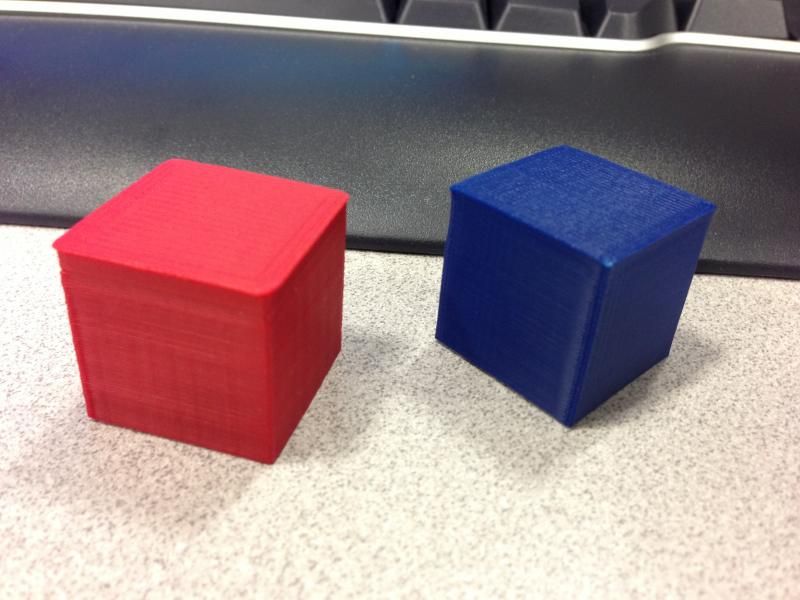
What about your extrusion multiplier settings? Have you tried a single-wall print test and used a micrometer to measure the thickness? After having calibrated my filament size, and extruder settings, My single wall thickness was coming out around 0.64mm instead of 0.55mm. So 0.55/0.64 = 0.859 - so I adjusted my extrusion multiplier to 0.86.
Take a look at my 100% infill calibration cubes. The one on the left was printed with the default extrusion multiplier of 1.0. And the right used the EXACT same configuration except the multiplier was set to 0.86.
http://www.flickr.com/photos/75376147@N ... 976583770/
(And no, I don't see any major delta arm blues going on, that really looks like a calibration issue)
(No trees were killed to post this message, but a large number of electrons were terribly inconvenienced.)