First off I'd like to thank SeeMeCnc for putting together an amazing kit. I had a ton of fun putting this thing together. They should be really proud of their creation.
Also, here are a few build notes to keep in mind while you work:
-Heatshrink goes on first.
-When in doubt the manual is correct. If something is not working go back and _read_ that whole section again to see what you missed.
-Objects on the internet are smaller than they appear.
-Heatshrink goes on first.
-Idler bearing spacers are slippery and seem to enjoy flying across the room.
-If you add a connector to the wiring, draw yourself a pin out diagram. You will get called to dinner at the least opportune time.
-Blue painters tape is your friend when dry fitting parts and mocking up wiring.
-Behr Marquee paint has a primer built in and covers the edges in one shot.
-And in case I forgot to mention: heatshrink goes on first.
Now, on with the show...
Printer Pr0n
-
RandomFactor
- Printmaster!
- Posts: 35
- Joined: Wed Apr 06, 2016 12:36 pm
Re: Printer Pr0n
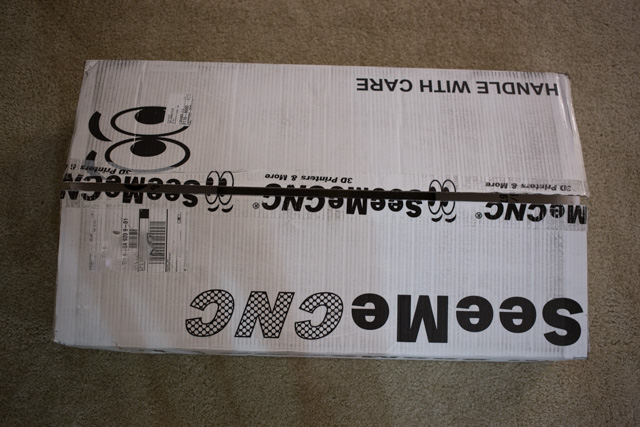
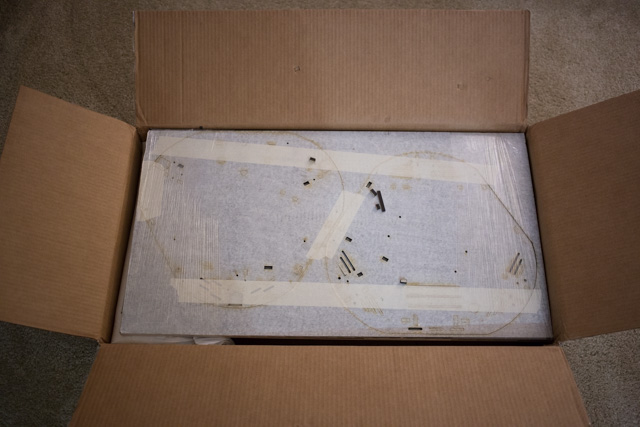
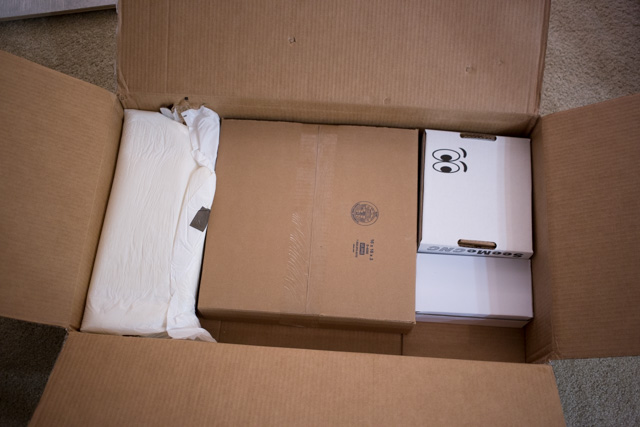
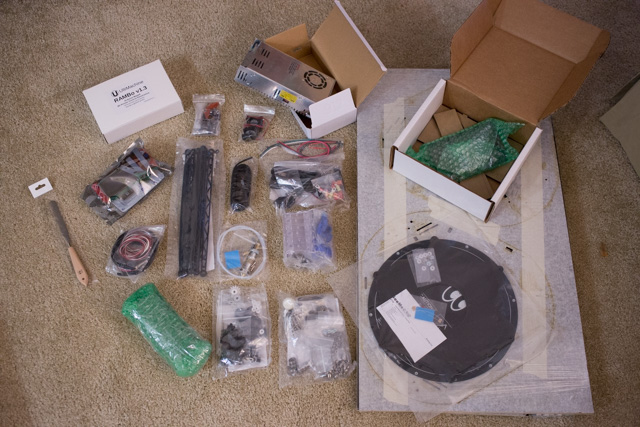
Obligatory unboxing pics.
Gotta give the SeeMeCnc folks credit, this is a well packaged kit. The handles in the sides of the box were really helpful when I had to haul the thing upstairs.
[img]http://pukaranch.com/rostock/_MG_7076.jpg[/img]
[img]http://pukaranch.com/rostock/_MG_7077.jpg[/img]
[img]http://pukaranch.com/rostock/_MG_7078.jpg[/img]
[img]http://pukaranch.com/rostock/_MG_7079.jpg[/img]
-
RandomFactor
- Printmaster!
- Posts: 35
- Joined: Wed Apr 06, 2016 12:36 pm
Re: Printer Pr0n
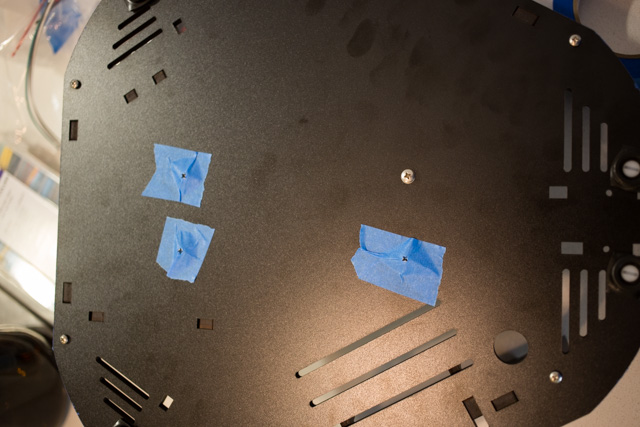
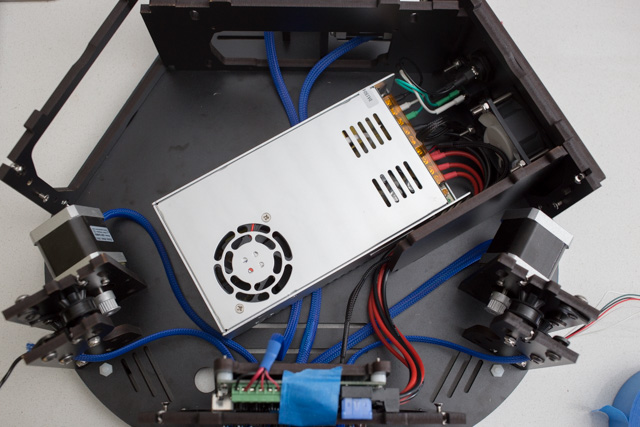
Alternate way to mount the power supply.
First, put the screws to mount the power supply into the base. Then tape them in place with blue painters tape. Next, punch your screwdriver through the tape into the head of the screw so you can find it later.
(Fourth screw shown without tape so you can see what's going on)
[img]http://pukaranch.com/rostock/_MG_7081.jpg[/img]
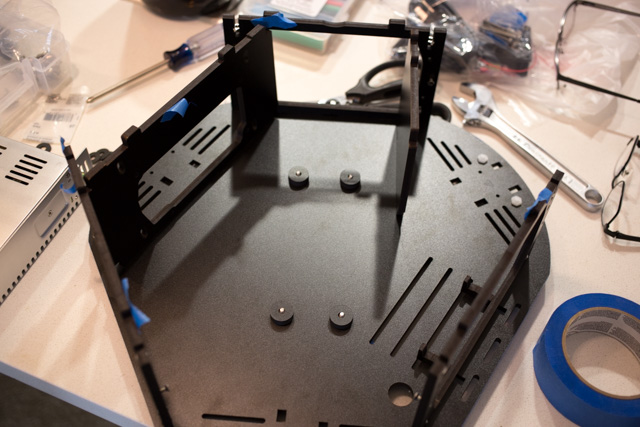
Now flip the base over and put the spacers on the screws.
[img]http://pukaranch.com/rostock/_MG_7083.jpg[/img]
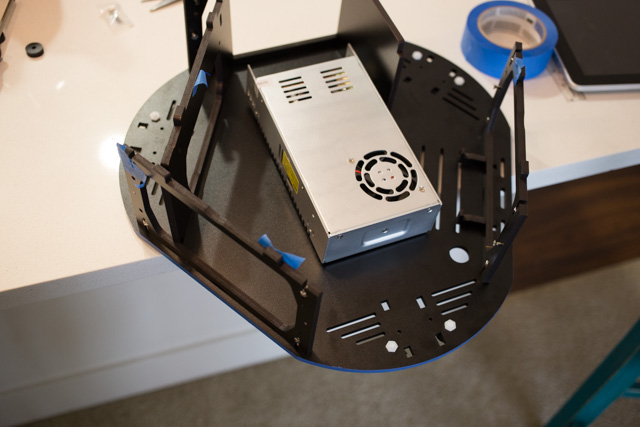
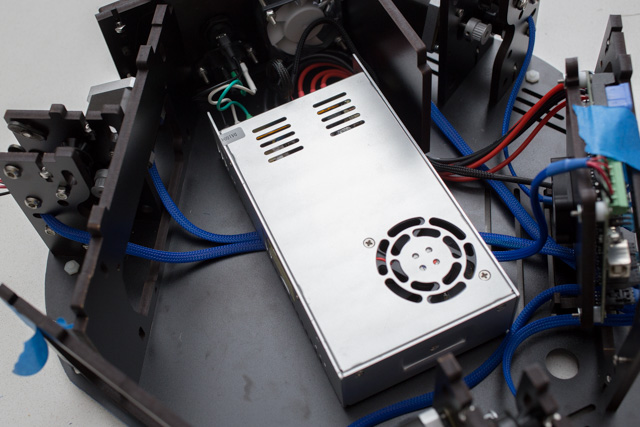
Finally, with the base hanging over the edge of your table so two screws are exposed, put your screwdriver up into a screw while you lower the power supply into place.
Once two screws are threaded, but not tight, rotate the base so the other two screws are over the edge and screw them in. Once you have all four screws threaded, tighten them down.
[img]http://pukaranch.com/rostock/_MG_7084.jpg[/img]
First, put the screws to mount the power supply into the base. Then tape them in place with blue painters tape. Next, punch your screwdriver through the tape into the head of the screw so you can find it later.
(Fourth screw shown without tape so you can see what's going on)
[img]http://pukaranch.com/rostock/_MG_7081.jpg[/img]
Now flip the base over and put the spacers on the screws.
[img]http://pukaranch.com/rostock/_MG_7083.jpg[/img]
Finally, with the base hanging over the edge of your table so two screws are exposed, put your screwdriver up into a screw while you lower the power supply into place.
Once two screws are threaded, but not tight, rotate the base so the other two screws are over the edge and screw them in. Once you have all four screws threaded, tighten them down.
[img]http://pukaranch.com/rostock/_MG_7084.jpg[/img]
-
RandomFactor
- Printmaster!
- Posts: 35
- Joined: Wed Apr 06, 2016 12:36 pm
Re: Printer Pr0n
So now what are we going to need?
https://youtu.be/k9HWGyp2p3U?t=16s
You betcha!
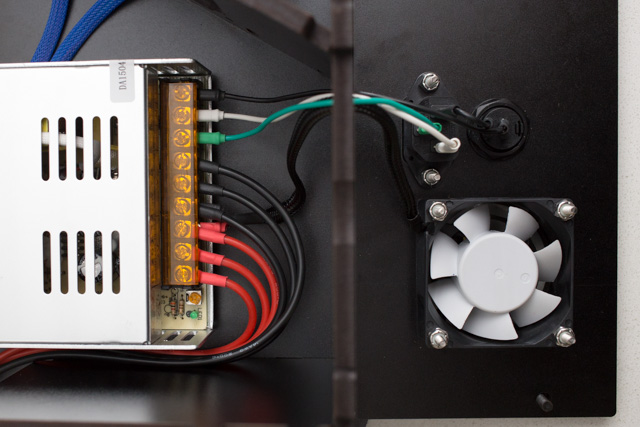
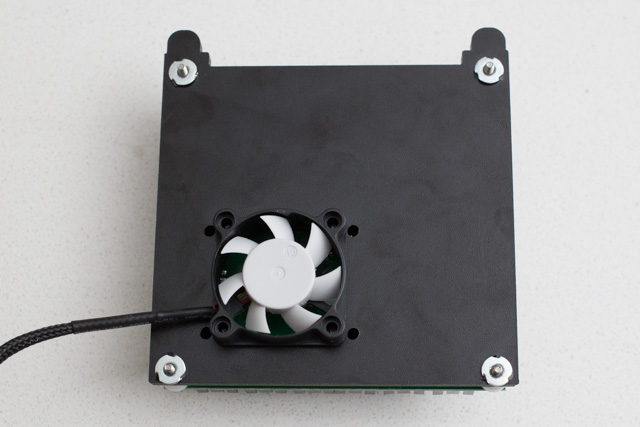
Here we have some sexy 14 gauge, silicone wrapped overkill. The fan is a Fractal Design Silent Series R2 FD-FAN-SSR2-60 60mm, pushing all of the same 20cfm as the included fan for a mere 17db. Oh, and it isn't baby poop brown like some other fans.
Unfortunately, that much air going through the grill cut into the panel makes a bit of a whooshing noise...
[img]http://pukaranch.com/rostock/_MG_7110.jpg[/img]
https://youtu.be/k9HWGyp2p3U?t=16s
You betcha!
Here we have some sexy 14 gauge, silicone wrapped overkill. The fan is a Fractal Design Silent Series R2 FD-FAN-SSR2-60 60mm, pushing all of the same 20cfm as the included fan for a mere 17db. Oh, and it isn't baby poop brown like some other fans.
Unfortunately, that much air going through the grill cut into the panel makes a bit of a whooshing noise...
[img]http://pukaranch.com/rostock/_MG_7110.jpg[/img]
-
RandomFactor
- Printmaster!
- Posts: 35
- Joined: Wed Apr 06, 2016 12:36 pm
Re: Printer Pr0n
Having read the manual 3 different ways from Sunday, I wound up building in modules, rather than strictly in order.
Here for your enjoyment, printer guts:
[img]http://pukaranch.com/rostock/_MG_7115.jpg[/img]
[img]http://pukaranch.com/rostock/_MG_7116.jpg[/img]
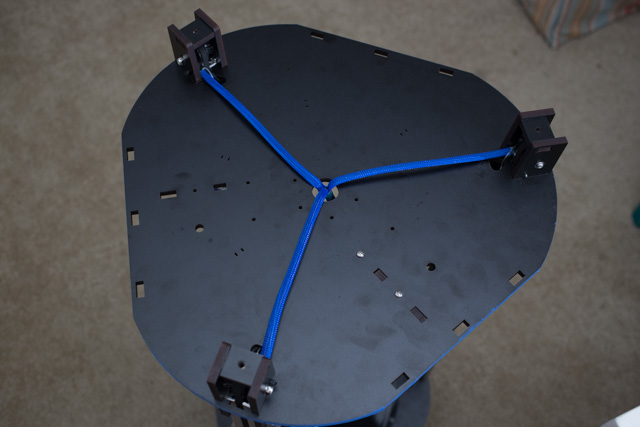
To keep the layout a bit cleaner I ran the endstops up the X tower, the power up the Z tower, and the extruder and thermistor wires up the Y tower.
Here for your enjoyment, printer guts:
[img]http://pukaranch.com/rostock/_MG_7115.jpg[/img]
[img]http://pukaranch.com/rostock/_MG_7116.jpg[/img]
To keep the layout a bit cleaner I ran the endstops up the X tower, the power up the Z tower, and the extruder and thermistor wires up the Y tower.
-
RandomFactor
- Printmaster!
- Posts: 35
- Joined: Wed Apr 06, 2016 12:36 pm
Re: Printer Pr0n
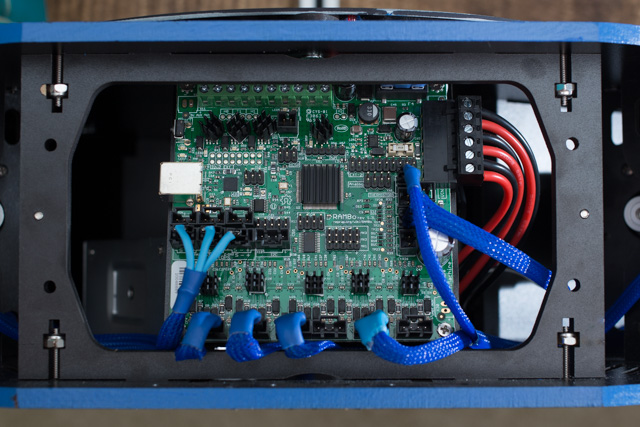
The careful observer may have noticed the Rambo board being held in place with blue painters tape while I mocked up the wiring.
Never fear, here's how that went together...
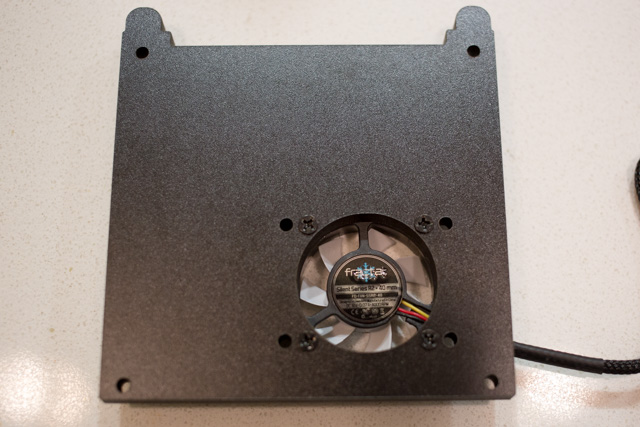
The fan was upgraded to a Fractal Design Silent Series R2 FD-FAN-SSR2-40 40mm, (also not poop brown). Don't get the R3 version, it doen't push as much air as the included fan.
Bonus number one, the cable is long enough to reach the power supply so, no soldering.
[img]http://pukaranch.com/rostock/_MG_7105.jpg[/img]
Bonus number two, the included mounting screws are just long enough. No need for zip ties.
[img]http://pukaranch.com/rostock/_MG_7100.jpg[/img]
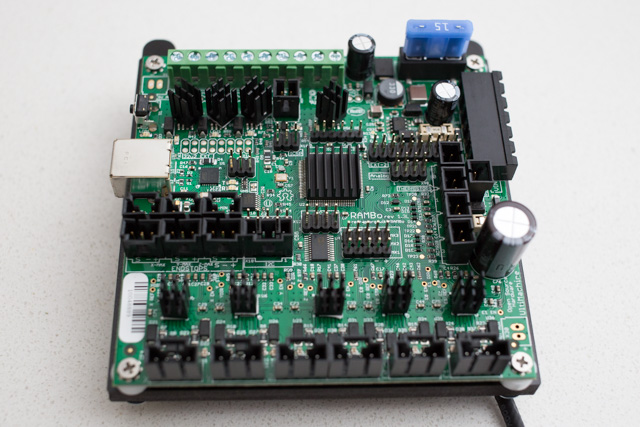
So here's the mounted Rambo board, complete with sexy, cool, and probably unnecessary heatsinks.
MOSFET and driver heatsinks from moddiy.com (6.5mm x 12mm I think).
Main chip heatsink is the big heatsink from a set for the RasberryPi.
3m thermal tape to stick things together.
[img]http://pukaranch.com/rostock/_MG_7103.jpg[/img]
Never fear, here's how that went together...
The fan was upgraded to a Fractal Design Silent Series R2 FD-FAN-SSR2-40 40mm, (also not poop brown). Don't get the R3 version, it doen't push as much air as the included fan.
Bonus number one, the cable is long enough to reach the power supply so, no soldering.
[img]http://pukaranch.com/rostock/_MG_7105.jpg[/img]
Bonus number two, the included mounting screws are just long enough. No need for zip ties.
[img]http://pukaranch.com/rostock/_MG_7100.jpg[/img]
So here's the mounted Rambo board, complete with sexy, cool, and probably unnecessary heatsinks.
MOSFET and driver heatsinks from moddiy.com (6.5mm x 12mm I think).
Main chip heatsink is the big heatsink from a set for the RasberryPi.
3m thermal tape to stick things together.
[img]http://pukaranch.com/rostock/_MG_7103.jpg[/img]
-
RandomFactor
- Printmaster!
- Posts: 35
- Joined: Wed Apr 06, 2016 12:36 pm
Re: Printer Pr0n
And the Rambo, done. Not quite visible here is the 14 gauge high temp silicone wrapped wire feeding the heated bed. No burnt screw connectors for me, thank you.
[img]http://pukaranch.com/rostock/_MG_7378.jpg[/img]
[img]http://pukaranch.com/rostock/_MG_7378.jpg[/img]
-
RandomFactor
- Printmaster!
- Posts: 35
- Joined: Wed Apr 06, 2016 12:36 pm
Re: Printer Pr0n
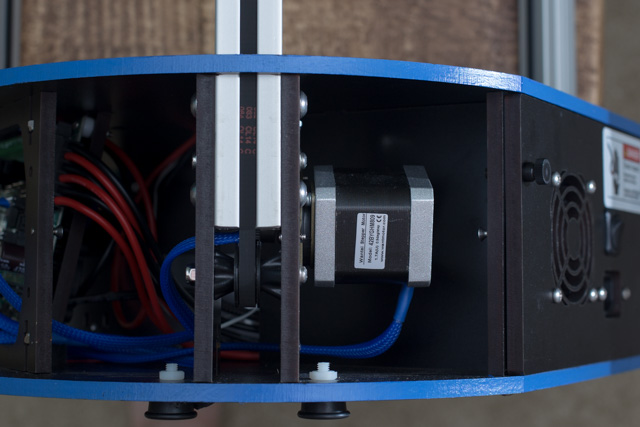
Now that we have the dirty work of assembling the base behind up, let's talk motors.
[img]http://pukaranch.com/rostock/_MG_7376.jpg[/img]
I switched out all four motors with these from sparkfun.com
https://www.sparkfun.com/products/10846
400 step/rev goodness. Necessary? No. Fun? Yes.
Downside, the wires are shorter and don't have a connector on the end. In fact, the leads for the Z motor don't quite reach so you'll have to splice in a bit of wire to get the length right.
The connectors are included with the Rambo kit and, after a bit of practice, are easy to put on.
The other caveat with these motors is the wires are different colors than the stock motors.
Here you go:
Stock Sparkfun
red = red
green = blue
yellow = green
blue = black
You're welcome.
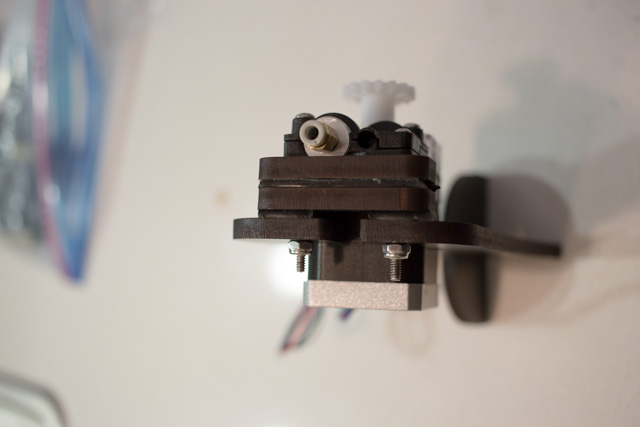
Once again the keen observer will note the presence of motor dampeners from MatterHackers:
http://www.matterhackers.com/store/prin ... ers-3-pack
You will need M4x5mm screws to mount these.
Interesting fact: with these dampeners installed the difference in length was enough for the inside corner of the Z motor to _just_ touch the vertical support making it louder than the other two. I had to cut a small notch in the vertical support in order for it to clear.
[img]http://pukaranch.com/rostock/_MG_7376.jpg[/img]
I switched out all four motors with these from sparkfun.com
https://www.sparkfun.com/products/10846
400 step/rev goodness. Necessary? No. Fun? Yes.
Downside, the wires are shorter and don't have a connector on the end. In fact, the leads for the Z motor don't quite reach so you'll have to splice in a bit of wire to get the length right.
The connectors are included with the Rambo kit and, after a bit of practice, are easy to put on.
The other caveat with these motors is the wires are different colors than the stock motors.
Here you go:
Stock Sparkfun
red = red
green = blue
yellow = green
blue = black
You're welcome.
Once again the keen observer will note the presence of motor dampeners from MatterHackers:
http://www.matterhackers.com/store/prin ... ers-3-pack
You will need M4x5mm screws to mount these.
Interesting fact: with these dampeners installed the difference in length was enough for the inside corner of the Z motor to _just_ touch the vertical support making it louder than the other two. I had to cut a small notch in the vertical support in order for it to clear.
-
RandomFactor
- Printmaster!
- Posts: 35
- Joined: Wed Apr 06, 2016 12:36 pm
Re: Printer Pr0n
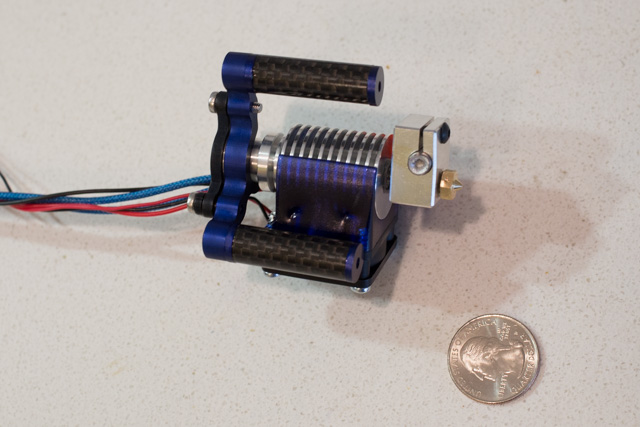
Let us pause for a moment to admire the nearly indecent beauty of the E3D V6 mount from 713maker.com.
Look at it. Looook aaat iiiit.
It even matches my color scheme.
[img]http://pukaranch.com/rostock/_MG_7096.jpg[/img]
Look at it. Looook aaat iiiit.
It even matches my color scheme.
[img]http://pukaranch.com/rostock/_MG_7096.jpg[/img]
-
RandomFactor
- Printmaster!
- Posts: 35
- Joined: Wed Apr 06, 2016 12:36 pm
Re: Printer Pr0n
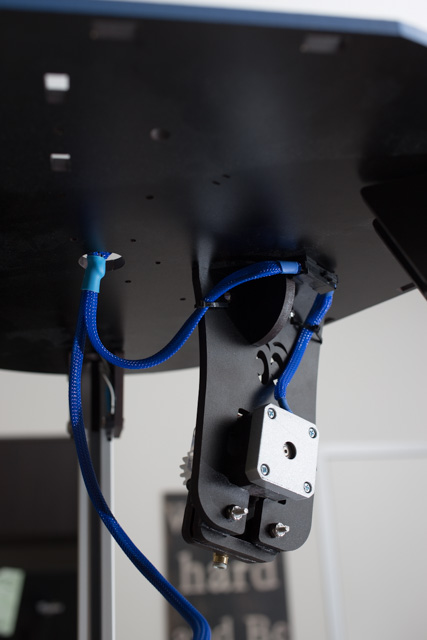
Which brings us to the top end. There. No kapton tape was harmed in the making of this printer.
[img]http://pukaranch.com/rostock/_MG_7380.jpg[/img]
Since there is no dampener to fit the extruder mount, I replaced one of the spacers with two strips of 1/8in Sorbothane. Each piece is sandwiched between the remaining two spacers from the kit.
Does it work? It sure seems quiet to me, but I didn't try it with the normal mount so I have nothing to compare it to.
[img]http://pukaranch.com/rostock/_MG_7089.jpg[/img]
All mounted up and ready to, um... extrude.
4 pin EPS connectors and pins from mainframecustom.com
https://mainframecustom.com/shop/cable- ... connector/
[img]http://pukaranch.com/rostock/_MG_7384.jpg[/img]
-
RandomFactor
- Printmaster!
- Posts: 35
- Joined: Wed Apr 06, 2016 12:36 pm
Re: Printer Pr0n
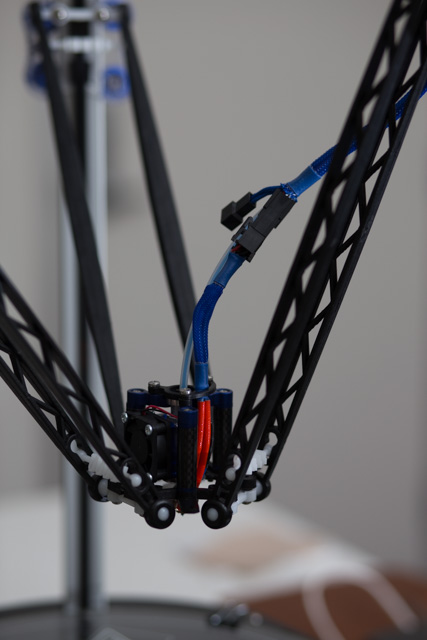
And here we see that fine E3D V6 mount all installed and looking quite cool.
6 pin PCI-E connector and pins from mainframecustom.com
https://mainframecustom.com/shop/cable- ... connector/
3 pin fan connector surgically removed from an extension cable and grafted in.
[img]http://pukaranch.com/rostock/_MG_7451.jpg[/img]
6 pin PCI-E connector and pins from mainframecustom.com
https://mainframecustom.com/shop/cable- ... connector/
3 pin fan connector surgically removed from an extension cable and grafted in.
[img]http://pukaranch.com/rostock/_MG_7451.jpg[/img]
-
RandomFactor
- Printmaster!
- Posts: 35
- Joined: Wed Apr 06, 2016 12:36 pm
Re: Printer Pr0n
As much fun as I had doing it in the wrong order, getting the B cable for the LCD backward, installing the effector plate upside down and having to flip it, there are a few other take aways from this build:
-Don't do the full cable management/sheathing thing unless you are truly OCD or have masochistic tendencies.
-Heatshrink goes on first.
-The screws for the heated bed are too short. They just are.
-Pressing the bearings into the idlers is no fun. Maybe a laser cut circle of the melamine that fits over the bearing that you could tighten down with a C-clamp...? Something. Not bad, just not fun.
-The #2 nuts for the LCD mount will frustrate you. Try this: put a #2 nut on a screw, set it down on the table, press the melamine part down onto the nut while gently rocking it. Once the nut is in, unscrew the screw.
But enough blather, you want to know: does it blend, er print?
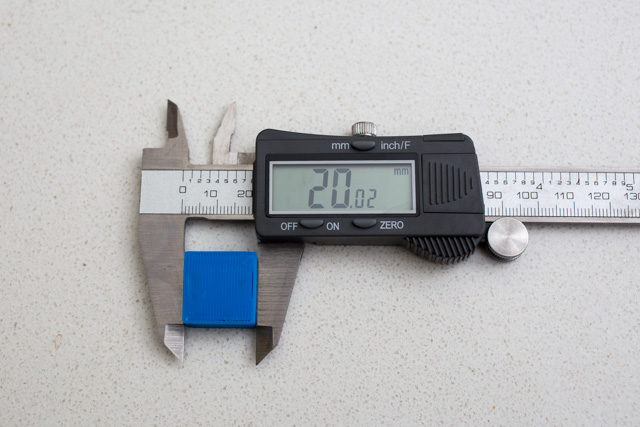
After more time than I would like to admit trying to get the high score on the calibration game, I grabbed some cheap ABS and made my first print: the 20mm calibration cube.
How'd it do? Pretty darn good. Heck of a kit.
[img]http://pukaranch.com/rostock/_MG_7454.jpg[/img]
-Don't do the full cable management/sheathing thing unless you are truly OCD or have masochistic tendencies.
-Heatshrink goes on first.
-The screws for the heated bed are too short. They just are.
-Pressing the bearings into the idlers is no fun. Maybe a laser cut circle of the melamine that fits over the bearing that you could tighten down with a C-clamp...? Something. Not bad, just not fun.
-The #2 nuts for the LCD mount will frustrate you. Try this: put a #2 nut on a screw, set it down on the table, press the melamine part down onto the nut while gently rocking it. Once the nut is in, unscrew the screw.
But enough blather, you want to know: does it blend, er print?
After more time than I would like to admit trying to get the high score on the calibration game, I grabbed some cheap ABS and made my first print: the 20mm calibration cube.
How'd it do? Pretty darn good. Heck of a kit.
[img]http://pukaranch.com/rostock/_MG_7454.jpg[/img]
-
RandomFactor
- Printmaster!
- Posts: 35
- Joined: Wed Apr 06, 2016 12:36 pm
Re: Printer Pr0n
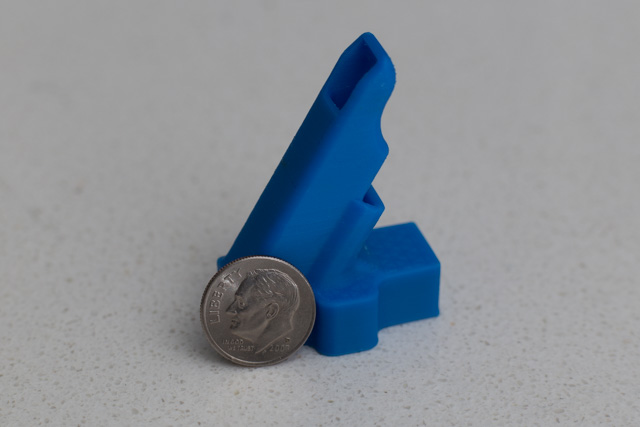
After tweaking the infill overlap and playing with the myriad of sliders, checkboxes, and tabs in MatterControl I went ahead and printed the layer fan shroud.
Dang! I was impressed.
[img]http://pukaranch.com/rostock/_MG_7429.jpg[/img]
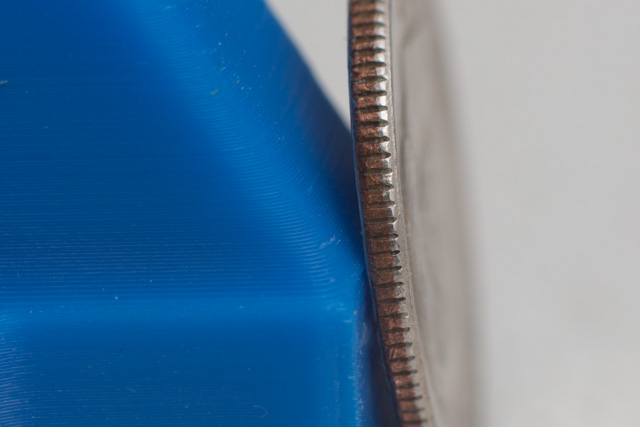
No really, check it out. No ringing, no zits, no shifting layers. Just awesome.
That's the edge of a _dime_ folks.
[img]http://pukaranch.com/rostock/_MG_7445.jpg[/img]
Sure, it took me the better part of a weekend to dial that in. But having never done it before I'm ok with that kind of learning curve.
And a friend (whose kids run Brother Robot print hub) gave me some Wolf Bite to fix my adhesion problem.
http://airwolf3d.com/shop/wolfbite-prev ... om-warping
Stuff is amazing.
Dang! I was impressed.
[img]http://pukaranch.com/rostock/_MG_7429.jpg[/img]
No really, check it out. No ringing, no zits, no shifting layers. Just awesome.
That's the edge of a _dime_ folks.
[img]http://pukaranch.com/rostock/_MG_7445.jpg[/img]
Sure, it took me the better part of a weekend to dial that in. But having never done it before I'm ok with that kind of learning curve.
And a friend (whose kids run Brother Robot print hub) gave me some Wolf Bite to fix my adhesion problem.
http://airwolf3d.com/shop/wolfbite-prev ... om-warping
Stuff is amazing.
-
RandomFactor
- Printmaster!
- Posts: 35
- Joined: Wed Apr 06, 2016 12:36 pm
Re: Printer Pr0n
So again, thanks to the folks at SeeMeCnc. Awesome kit, phenomenal customer support.
Thanks to geneb for great manuals.
And thanks to all of you on the forum for answering all my questions before I asked them. I only had to search this forum.
Thanks to geneb for great manuals.
And thanks to all of you on the forum for answering all my questions before I asked them. I only had to search this forum.

Re: Printer Pr0n
Badass. If you could see my wiring job, you'd cry! 
-
Windshadow

- Printmaster!
- Posts: 526
- Joined: Mon Nov 30, 2015 6:35 pm
- Location: Mid Coast Maine
Re: Printer Pr0n
Well Done, and if you forget that the heat shrink goes on first then self vulcanizing tape is your friend 
seriously a very handsome and neat job... and a well documented build. I look forward to your future posts here in the forum.
seriously a very handsome and neat job... and a well documented build. I look forward to your future posts here in the forum.
-
Eaglezsoar

- ULTIMATE 3D JEDI
- Posts: 7185
- Joined: Sun Apr 01, 2012 5:26 pm
Re: Printer Pr0n
Great job on documenting your build.
Impressive and neat build as well, thanks for posting this!
Impressive and neat build as well, thanks for posting this!
“ Do Not Regret Growing Older. It is a Privilege Denied to Many. ”
-
barry99705

- Printmaster!
- Posts: 707
- Joined: Sun Aug 11, 2013 6:10 pm
- Location: west ohio
Re: Printer Pr0n
Man, that cabling brings a tear to my eye! I'm using speaker wire to extend the power cables to my extruder motor....
Never do anything you don't want to have to explain to the paramedics.
-
Jimustanguitar

- ULTIMATE 3D JEDI
- Posts: 2631
- Joined: Sun Mar 31, 2013 1:35 am
- Location: Notre Dame area
- Contact:
Re: Printer Pr0n
That's one of the cleanest build I've ever seen. Love the color scheme, too. Great work!
Re: Printer Pr0n
Yeah, the loom sheath is very, very nice. The only thing that could make it better is if the wire was wax-laced first.
So fess up, why are you SO sure that the heatshrink goes on first?
g.
So fess up, why are you SO sure that the heatshrink goes on first?
g.
Delta Power!
Defeat the Cartesian Agenda!
http://www.f15sim.com - 80-0007, The only one of its kind.
http://geneb.simpits.org - Technical and Simulator Projects
Defeat the Cartesian Agenda!
http://www.f15sim.com - 80-0007, The only one of its kind.
http://geneb.simpits.org - Technical and Simulator Projects
-
RandomFactor
- Printmaster!
- Posts: 35
- Joined: Wed Apr 06, 2016 12:36 pm
Re: Printer Pr0n
Let's just say that some of the connectors you see in the pics may not be the first, or even the second ones I put on there.geneb wrote:So fess up, why are you SO sure that the heatshrink goes on first?
I think the connector on the hotend wiring went on once, realized I'd mixed up the pins (see note about drawing a pin out diagram), re-did it, realized I forgot the heatshrink, started to redo it, realized I was out of pins, ordered more pins, waited patiently for pins to arrive, and then finally got the connector done correctly.
I now have a lot of practice crimping pins and assembling connectors.
Re: Printer Pr0n
Agree. Awesome build and nicly done. Slick and clean!!
My 3D-Printing learning curve is asymptotic to a Delta's X, Y and Z-axes
-
DeltaCon

- Printmaster!
- Posts: 616
- Joined: Sat Nov 14, 2015 5:01 am
- Location: Wessem, The Netherlands
- Contact:
Re: Printer Pr0n
Yes, I guess you must have had a lot of patience here, but it sure paid off!RandomFactor wrote:Don't do the full cable management/sheathing thing unless you are truly OCD or have masochistic tendencies.
Uhmmm, yep, that has bitten me in the ass more than once...RandomFactor wrote:-Heatshrink goes on first.
Great job, be proud! Especially with that fine printquality, lot's of us will be jealous!
I am DeltaCon, I have a delta, my name is Con, I am definitely PRO delta! 
Rostock V2 / E3D Volcano / FSR kit / Duet 0.6
PS.: Sorry for the avatar, that's my other hobby!
Rostock V2 / E3D Volcano / FSR kit / Duet 0.6
PS.: Sorry for the avatar, that's my other hobby!
-
Captain Starfish

- Printmaster!
- Posts: 962
- Joined: Tue Dec 10, 2013 5:24 am
Re: Printer Pr0n
RandomFactor wrote: -Heatshrink goes on first.
*Every
Gods
Damned
Time!
[img]http://emo.simonlockwood.net/wallbash.gif[/img]