My build thread
My build thread
Not getting mine until next week at the earliest, ordering it friday because that's when ill have the money  . Getting the full kit ($350). I got finals starting June 12th but im still gonna build mine soon , i got the day before finals off to study so this IS gonna be built or it will kill me if i wait.

Re: My build thread
Then, now's the time to download and read the H-1 Assembly Manual and the H-1 Electronics Manual! Required reading. You can find them in the Documents forum.
cheers,
Michael
cheers,
Michael
Sublime Layers - my blog on Musings and Experiments in 3D Printing Technology and Art
Start Here:
A Strategy for Successful (and Great) Prints
Strategies for Resolving Print Artifacts
The Eclectic Angler
Re: My build thread
And also, go download the newest slic3r version, at http://slic3r.org Click on your OS icon in the top right, and that'll take you to the index of his downloads page. If you're on windows, grab the 082 zip file. Start downloading "things" and slicing them with different settings, just to get a feel for the software
Re: My build thread
Already started reading it awhile agomhackney wrote:Then, now's the time to download and read the H-1 Assembly Manual and the H-1 Electronics Manual! Required reading. You can find them in the Documents forum.
cheers,
Michael
Re: My build thread
Ordered mine today, P.S thanks johnoly99
Re: My build thread
Got everything except the kit(silicon, kapton tape, filament ect), thats coming monday, it takes about 20 hours to assemble . It will be done by thursday lol
Re: My build thread
Got it finally, been working on it for awhile, got the front and rear frame assembled , and most of the z axis base just need to add the threaded rods, got finals this week starting Wednesday so im studying now.
-
michaellatif

- Printmaster!
- Posts: 357
- Joined: Mon Mar 26, 2012 1:34 pm
- Location: RTP, NC
Re: My build thread
Studying!! HA! I remember those days! Finals sucked . . . glad I am done with all of that messtom10122 wrote:got finals this week starting Wednesday so im studying now.
Best of luck Tom!
Mike Latif
H-1 #3
H-1 #3
Re: My build thread
lol Yeah , took a break from studying. I didn''t get an easy driver board 
Re: My build thread
Tom, you got the 4 axis stepper control board, you use the A axis on that board as the extruder, so no easy driver used with that new board
Re: My build thread
ok thanks , so i just plug it in the same way as the x y and z motors?
Re: My build thread
Gwahhh Messedd up the velleman , ordered a new one already. tried to switch out the led and ripped the copper right off, couldn't get it fixed with solder .
Re: My build thread
You can also use jumper wires to fix them. Don't ask how I know! My original Vellman looks like crap and works like a charm! I've replaced diodes and resistors, drilled holes in it for the external control mod, and ripped copper traces off and repaired with wire. It's a pretty robust device. Fix it and use it for a hot bed.
cheers,
Michael
cheers,
Michael
Sublime Layers - my blog on Musings and Experiments in 3D Printing Technology and Art
Start Here:
A Strategy for Successful (and Great) Prints
Strategies for Resolving Print Artifacts
The Eclectic Angler
Re: My build thread
Also, to answer your question - yes, the A axis (extruder stepper) simply plugs into the 4 axis ports alongside the X, Y and Z.
cheers,
Michael
cheers,
Michael
Sublime Layers - my blog on Musings and Experiments in 3D Printing Technology and Art
Start Here:
A Strategy for Successful (and Great) Prints
Strategies for Resolving Print Artifacts
The Eclectic Angler
Re: My build thread
thanks, tried re wiring it but nothing , got my entire h-1 assembled except the velleman, fooling around the mach 3 I have no idea what im doing
Re: My build thread
Tom,
Look on the Mach3 configuration forum for more details on wiring the 4 axis board and using Mach3 with it. Here is a link to the forum for that board http://forum.seemecnc.com/viewtopic.php ... 2392#p2392. For using Mach3, on youtube there are 5 videos from the programmer outlining the functions and operations. Here is a link to outland86's youtube page, the first videos are the 5 tutorials http://www.youtube.com/user/outland86/videos. You want to make sure first that your motors are going the correct + and - for each axis. In the seemecnc manual, they outline the correct + and - direction for each axis. In the above forum link you can find how to reverse the direction of the motors if they are not correct. You can also verify this by opening Mach3. Hitting the Reset button to gain control of the H-1. Next hit the Tab button on your keyboard to open manual control of the H-1. On the right side of mach3, you will find + and - buttons for each of the axis. Clicking one of these will move the H-1 and the correct + and - direction can be determined from this. You can now start tuning your motors for the correct travel. You will need some kind of distance measuring device. I would suggest a machinist's dial indicator, here is a link to one http://www.harborfreight.com/1-inch-tra ... r-623.html. You will also need something to mount it to, I suggest a multipositional Magnetic Base, here is a link for an example http://www.harborfreight.com/multiposit ... -5645.html. To calibrate, position the Dial or measuring device on one of the axis of travel. Now within Mach3 look to the top of the program and look for the Settings button, Pic below. On this screen you can tell the H-1 to travel a set amount. Keep in mind also the amount of distance you request the device to travel will be either mm or inchs. This was set when you first installed mach3. Before you start calibrating take a look at the motor tuning profiles. To access this information Click the Config menu item, then Motor Tuning, pic below. Each axis is represented on the right and in the above forum link you can find profiles from me and mchackney. Now that you have setup your motor tuning profiles you are ready to calibrate. On the Settings page Click -> Set Steps per Unit Button just above the Reset button, pic below. Now select the axis you want to calibrate from the corresponding box, X,Y,Z and A (A= Extruder motor, to calibrate take off the Extruder tip and measuring the distance that the filament travels from the indicated amount entered after you select the A Axis for calibration. The travel should match this distance.). Each time you tell the H-1 to move Mach3 will then ask you how much it really traveled. You can use the feature but adjusting the profiles manual is usually best. After you have calibrated each axis you are ready to start printing. Make sure your bed is very level. The extruder is going to be printing around .3mm from the bed and any miscalculation will be visible in your print.
Hope this helps,
Mtizle
- Attachments
-
-
-
Re: My build thread
thanks alot , can i just use a ruler though? if so what are the units in?
Re: My build thread
i believe my y and z axis are calibrated, still need to put the pulley on the x, waiting for the velleman.
Re: My build thread
just found out my velleman was out of stock , you'd think they'd tell you that? Ordered a pre built one from apogeekits.com 2 day air for about $40
Re: My build thread
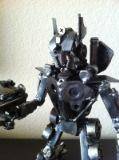
Little late but heres some pics of my setup ,
- My tv/computer screen running mach3
- Almost finished printer
- Psus
- 4 axis board
Re: My build thread
School is OUT !!!!  In PA until Wednesday and the velleman should've arrived today .
Re: My build thread
Finaluy up and running , now i gotta fix the x-axis skew, jumepering the optos now