
It's that time of year again, and Gray's getting stripped down in preparation for some upgrades.
I've kept him together for almost nine months this time, a new personal best.
He's getting the following upgrades:
- full two axis torso
- torso update to accept a KinectOne sensor
- updated finger servo pulleys
- updated eye mechanism
- updated jaw mechanism
Should make for a fun couple of weeks. Wish me luck!
Alan
[img]http://i.imgur.com/E1TiJKdh.jpg[/img]
It's time for some upgrades... [InMoov]
It's time for some upgrades... [InMoov]
Last edited by gestalt73 on Sun Feb 07, 2016 8:09 pm, edited 1 time in total.
-
Eaglezsoar

- ULTIMATE 3D JEDI
- Posts: 7185
- Joined: Sun Apr 01, 2012 5:26 pm
Re: It's time for some upgrades... [InMoov]
I wish you luck and don't forget the pictures, please. 
-
Tincho85

- Printmaster!
- Posts: 659
- Joined: Sun Nov 03, 2013 12:27 pm
- Location: Buenos Aires, Argentina
Re: It's time for some upgrades... [InMoov]
Indeed, more pictures!!
Good luck with your project
EDIT: picture removed.
Good luck with your project
EDIT: picture removed.
Last edited by Tincho85 on Mon Feb 08, 2016 9:48 am, edited 2 times in total.
Martín S.
Re: It's time for some upgrades... [InMoov]
More Progress pictures.
[img]http://i.imgur.com/sEyJqTkl.jpg[/img]
[img]http://i.imgur.com/C5s8U92l.jpg[/img]
[img]http://i.imgur.com/rDiiAtgl.jpg[/img]
[img]http://i.imgur.com/sEyJqTkl.jpg[/img]
[img]http://i.imgur.com/C5s8U92l.jpg[/img]
[img]http://i.imgur.com/rDiiAtgl.jpg[/img]
-
Khalid Khattak
- Printmaster!
- Posts: 276
- Joined: Thu Dec 11, 2014 12:50 am
Re: It's time for some upgrades... [InMoov]
Thats an engineering marvel and nice piece of art. I am amazed to see the shining surface . It looks like you also did some molding work.
Pls share your progress.
Pls share your progress.
-
Eaglezsoar
- ULTIMATE 3D JEDI
- Posts: 7185
- Joined: Sun Apr 01, 2012 5:26 pm
Re: It's time for some upgrades... [InMoov]
You may have spoken about how you created this but I do not remember.
Is he from molds, 3D printed or a combination of both? Just curious how a fine piece of technology exists.
Is he from molds, 3D printed or a combination of both? Just curious how a fine piece of technology exists.
Re: It's time for some upgrades... [InMoov]
It would be my pleasure.
InMoov is an open source android created by sculptor-turned-roboticist Gael Langevin.
http://inmoov.fr/" onclick="window.open(this.href);return false;
http://inmoov.fr/build-yours/" onclick="window.open(this.href);return false;
Many people around the world have built an InMoov clone.
https://www.google.com/maps/d/viewer?mi ... zNjXUbWLl4" onclick="window.open(this.href);return false;
My InMoov clone's name is Grey, and he's been functionally complete for about a year now.
He was featured on the cover of Make: magazine last year.
http://www.makershed.com/products/make- ... -volume-45
http://makezine.com/2015/06/19/in-our-image/
http://makezine.com/2015/06/23/inmoov-around-the-world/
With the exception of the nuts, bolts, servos and wiring, everything on Grey was printed on a Rostock Max.
- Frame pieces were printed in grey at 250 micron layer height
- All screw, worm and gear pieces were printed in grey at 100 micron layer height
- All white panels were printed in white at 100 micron layer height
- The initial build was done in ABS. All of my latest changes are printed in PLA
- All of the white panels were finished by lots of sanding, a filling primer and white acrylic spray paint
As I work on the bot, I'll make changes to the design, and publish those changes to thingiverse so others can make use of them.
http://www.thingiverse.com/gestalt73/designs
Grey has a total of 28 degrees of freedom from from 31 different servos. (This text in this graphic matches the original design, Grey's a little different)
[img]http://i1.wp.com/makezine.com/wp-conten ... 20x302.jpg[/img]
Image by Hep Svadja
[img]http://cdn.shopify.com/s/files/1/0243/7 ... 1433305808[/img]
Image by Hep Svadja
-
Eaglezsoar
- ULTIMATE 3D JEDI
- Posts: 7185
- Joined: Sun Apr 01, 2012 5:26 pm
Re: It's time for some upgrades... [InMoov]
Is the complete project with Bom lists, STLS and instructions on a Github somewhere or is this a find it if you can type of project?
Thanks gestalt73.
Thanks gestalt73.
-
barry99705

- Printmaster!
- Posts: 707
- Joined: Sun Aug 11, 2013 6:10 pm
- Location: west ohio
Re: It's time for some upgrades... [InMoov]
http://inmoov.fr/build-yours/" onclick="window.open(this.href);return false;Eaglezsoar wrote:Is the complete project with Bom lists, STLS and instructions on a Github somewhere or is this a find it if you can type of project?
Thanks gestalt73.
Mute your speakers first, or turn them way down. Stupid auto starting background noises.
Never do anything you don't want to have to explain to the paramedics.
Re: It's time for some upgrades... [InMoov]
Almost done!
All of the chest and head plastics are either replaced or refinished. Some of those panels were printed a couple of years ago, and I've gotten a bit better at printing since then.
I got caught up in messing with the eye mechanism design, so I wasn't able to finish the head and neck assembly this weekend.
So all that's left:
- complete eye redesign, print and assemble
- complete assembly of Bob Houston's articulated neck
- wire the new joints into the head microcontroller
[img]http://i.imgur.com/lmjKt7b.jpg[/img]
[img]http://i.imgur.com/e6a8CsG.jpg[/img]
[img]http://i.imgur.com/M9ZdYnk.jpg[/img]
-
Khalid Khattak
- Printmaster!
- Posts: 276
- Joined: Thu Dec 11, 2014 12:50 am
Re: It's time for some upgrades... [InMoov]
Unbelievable.. Your 3D printer is too accurate.. Love to see your work...
-
Windshadow

- Printmaster!
- Posts: 526
- Joined: Mon Nov 30, 2015 6:35 pm
- Location: Mid Coast Maine
Re: It's time for some upgrades... [InMoov]
I agree amazing craftsmanship Well Done!
Re: It's time for some upgrades... [InMoov]
I for one, welcome our new plastic overlords!
g.
g.
Delta Power!
Defeat the Cartesian Agenda!
http://www.f15sim.com - 80-0007, The only one of its kind.
http://geneb.simpits.org - Technical and Simulator Projects
Defeat the Cartesian Agenda!
http://www.f15sim.com - 80-0007, The only one of its kind.
http://geneb.simpits.org - Technical and Simulator Projects
-
barry99705
- Printmaster!
- Posts: 707
- Joined: Sun Aug 11, 2013 6:10 pm
- Location: west ohio
Re: It's time for some upgrades... [InMoov]
Needs a different face...geneb wrote:I for one, welcome our new plastic overlords!
g.
Never do anything you don't want to have to explain to the paramedics.

Re: It's time for some upgrades... [InMoov]
Have they released the new hand design to the public yet? I think it is far superior to the old one that is used now.
Re: It's time for some upgrades... [InMoov]
I've finished the changes and build for EyeMechanism2 and posted the files to Thingiverse:
http://www.thingiverse.com/thing:1328236
These eye supports are designed for the Microsoft Lifecam HD-3000.
I also made a couple of tweaks to some of the other files.
This V2 mechanism is sturdy, with no slop or play in the joints once everything is tightened down.
I think this means that the head gets reassembled tonight. Almost done!
[img]http://i.imgur.com/oPWCUHp.jpg[/img]
[img]http://i.imgur.com/A6ex7Uf.jpg[/img]
Re: It's time for some upgrades... [InMoov]
Ok, now we're cookin' with gas.
Grey is fully assembled.
First, the good:
- wiring was straightforward, with only one bad connection (loose crimp)
- new neck assembly was a snap
- eye mechanism fit into head assembly with no issues
- great range of motion for the eyes now.
- eye cameras both still work
- simple to integrate the new servos into the existing microcontroller framework
- jaw now works
Now the challenges:
- the Bob's articulated neck design is really neat, but I'm getting too much play in the side to side assemblies and the joints tend to pop off. I have a couple of ideas on how to address it. I'll need to model the subassembly and play around with some things.
- there is a slight interference between the eye subassembly and the jaw assembly in some positions. need to verify where it's hitting, and push an updated eyesupport bracket design.
- the jaw geometry doesn't seem to allow the jaw to close all the way, need to update one of the brackets to give a little more clearance.
Also in both head sets that I've printed, and both eye mechanisms, the eye mechanism mounts 1-ish mm to the bot's right. I see the same offset when I model the subassembly. My clearances between the eye and the faceplate are very tight, and the right eye may rub a bit. I may try to update one of the brackets and push the update.
Alan
[img]http://i.imgur.com/g4JdPh8.jpg[/img]
-
Eaglezsoar
- ULTIMATE 3D JEDI
- Posts: 7185
- Joined: Sun Apr 01, 2012 5:26 pm
Re: It's time for some upgrades... [InMoov]
That is superb! I can't even guess how many hours you have invested.
You should be very, very proud of what you have created. The best I have ever seen that has been handcrafted.
Wonderful job!
You should be very, very proud of what you have created. The best I have ever seen that has been handcrafted.
Wonderful job!
“ Do Not Regret Growing Older. It is a Privilege Denied to Many. ”
-
thedoble

- Printmaster!
- Posts: 131
- Joined: Fri Dec 25, 2015 8:32 pm
- Location: Brisbane, Australia
- Contact:
Re: It's time for some upgrades... [InMoov]
Wow, this is amazing, very well done. Congratulations!
I understand that this might be an odd question, but what do you plan to use the resulting 'android' for?
Of course, a project with such magnitude justifies itself, but I thought I would ask if you have further plans for it
I understand that this might be an odd question, but what do you plan to use the resulting 'android' for?
Of course, a project with such magnitude justifies itself, but I thought I would ask if you have further plans for it
Smoke me a kipper, I'll be back for breakfast.
Re: It's time for some upgrades... [InMoov]
Hey thedoble,
No worries, it's actually a really common question for these sort of projects.
Grey's sole purpose is to serve as a platform to allow me to learn about robotics.
Thanks to him I've learned more in the past few years about actual real robotics than I've ever been exposed to before.
Unfortunately he'll never be suitable for any type of useful task, but as a learning platform? He's pretty awesome.
Although he was set up next to my Christmas Tree in front of the picture window. He was running a small script to hang a christmas ornament. That's about it for useful tasks.
Alan
Re: It's time for some upgrades... [InMoov]
The Neck Remix is done, and it's looking really good. I was holding off on publicizing the mod because I was having problems with the servos.
[youtube]http://www.youtube.com/watch?v=FPV6k8QfDY8[/youtube]
So it turns out that the problems I was having were 100% operator error.
1. I hadn't doublechecked my max and min limits for the new neck servos, keeping in mind that there's 3-5mm of play in the pistons because of the clearances between piston and piston base
2. The crossover wiring between the servo and the slave servo had a loose crimp, which could have also caused the burnout.
So I'm sure that the original HiTec servos worked just fine.
These HobbyKing HK15328D digital servos are working out really well also, and they're only $8 each.
Alan
-
barry99705
- Printmaster!
- Posts: 707
- Joined: Sun Aug 11, 2013 6:10 pm
- Location: west ohio
Re: It's time for some upgrades... [InMoov]
Wonder if anyone has made one with a chromed skull for the head yet? 
Really cool by the way.
Really cool by the way.
Never do anything you don't want to have to explain to the paramedics.
-
Eaglezsoar
- ULTIMATE 3D JEDI
- Posts: 7185
- Joined: Sun Apr 01, 2012 5:26 pm
Re: It's time for some upgrades... [InMoov]
How about a crystal skull on him? Just kidding, this project is superb just the way it is.barry99705 wrote:Wonder if anyone has made one with a chromed skull for the head yet?
Really cool by the way.
“ Do Not Regret Growing Older. It is a Privilege Denied to Many. ”
Re: It's time for some upgrades... [InMoov]
Needs a Fedora.
g.
g.
Delta Power!
Defeat the Cartesian Agenda!
http://www.f15sim.com - 80-0007, The only one of its kind.
http://geneb.simpits.org - Technical and Simulator Projects
Defeat the Cartesian Agenda!
http://www.f15sim.com - 80-0007, The only one of its kind.
http://geneb.simpits.org - Technical and Simulator Projects
-
barry99705
- Printmaster!
- Posts: 707
- Joined: Sun Aug 11, 2013 6:10 pm
- Location: west ohio
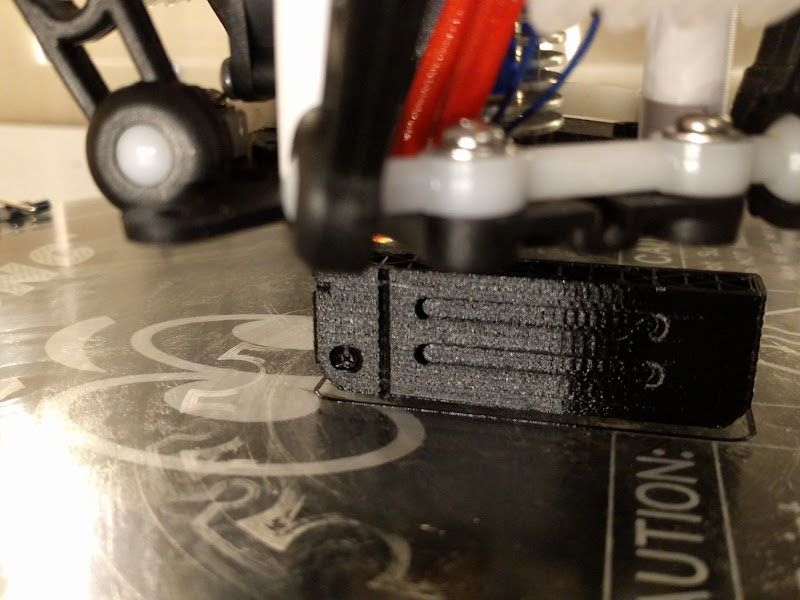
Re: It's time for some upgrades... [InMoov]
Speaking of, I printed out this last night. Need to paint it, I was just amazed you can see the screw heads!geneb wrote:Needs a Fedora.
g.
[img]https://lh3.googleusercontent.com/-e7DE ... 073222.jpg[/img]
[img]https://lh3.googleusercontent.com/-EFUA ... 212902.jpg[/img]
Never do anything you don't want to have to explain to the paramedics.