ORION MAX LIMITS
If you program the machine to move outside of the limits, all you have to watch for is arm interference. There's very little chance you'll burn up a motor or break it. We spec a 6" circle because it's easy to understand. Here's the max area STL, but watch out, the 25mm fan shroud and arm will hit! That will crack the fan shroud (of course just print another one). I just whipped this up and printed a single wall (and chewed up my fan shroud a little when the arm hit it). I could have cut the shroud with a utility knife. Manually drag it in Repetier so the straight edges are tangent to the circle. Click the 'drop' button to make sure the model is on the bed (not auto position). Say 'no' to stop slicing. If it doesn't want to slice, change your printer radius to 150mm in 'printer settings' in Repetier.
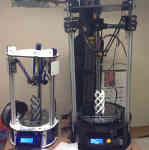
Here's a couple pics to help visualize the interference of things....
- ORION Bed Dia and Print Circle
- ORION Max Limits Interference
Is it advisable. Meh. Use your judgement here... with a stock setup, I really don't believe it's possible to burn up a motor or break anything. You might (10% chance) break an arm or chew up a timing belt, but I doubt it. My parts are incredibly tough. That's what I want. I don't like buying something that doesn't last. I don't like selling something that doesn't last. The arms will just pop off or stall the motor. If a motor failed, I'll bet it wasn't a stock setup. And unless there's a defect (which we've have seen 1 in 10000, which is impressive), the motor will not fail on a stock setup. Post a link for me and I'll investigate.