OK, so NOW it actually PRINTS things - thanks to everyone that helped me through the build.
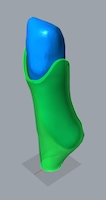
I now have a couple of bits of purple plastic that closely resemble the first and second "projects" suggested in the manual.
Trouble is BOTH of them are too tight to get the fans into, so I am wondering if there is a width issue with my extruder, or... or what ?
The PEEK fan shroud clips onto the two aluminum tubes easily enough, so I doubt that there is a general scaling problem. In fact I didn't have to loosen the screws that go through those aluminum tubes, so now I'm wondering if there is a general "slump" problem, i.e. the ABS isn't circular but oval, which would decrease height and increase width - thereby narrowing openings in X and Y directions.
Is this a common problem with the fan shrouds (& newbie printer people) ?
I am using the ABS_Slic3r settings in Print settings, Printer Settings and Filament Settings: Extruder 1:
Fan shrouds - size of fan openings ?
Re: Fan shrouds - size of fan openings ?
if you want to try to see if it is your slicer, you can download https://github.com/seemecnc/Orion_Delta ... DE/FAN.GCO (right click raw and save as to save the file) and use that gcode and see how it prints..
Guanu
Guanu
Re: Fan shrouds - size of fan openings ?
Thanks,
Please help me understand how that might help ?
I just remembered that there is a test cube somewhere and I was going to look for that.
Please help me understand how that might help ?
I just remembered that there is a test cube somewhere and I was going to look for that.
-
Eaglezsoar

- ULTIMATE 3D JEDI
- Posts: 7159
- Joined: Sun Apr 01, 2012 5:26 pm
Re: Fan shrouds - size of fan openings ?
See these links for calibration cubes:RegB wrote:Thanks,
Please help me understand how that might help ?
I just remembered that there is a test cube somewhere and I was going to look for that.
http://www.thingiverse.com/thing:5011
http://www.thingiverse.com/thing:56671
http://www.thingiverse.com/thing:240444
You can find more by searching Thingiverse.com for calibration cubes.
“ Do Not Regret Growing Older. It is a Privilege Denied to Many. ”
Re: Fan shrouds - size of fan openings ?
Thanks for the links.
Well, it seems THIS machine is just about 5% SHORT on X and Y, no matter WHAT I print, no matter WHICH slicer I use.
=====================================
This is an aside, but marks some other progress;
a) I used Cura 14.07 standalaone with an .ini file published on the forum by user dgriff.
http://forum.seemecnc.com/viewtopic.php ... it=SD+card
b) I printed from the SDHC card for the first time.
I hadn't paid much attention to support structures - it turned out that it was ON and I got a nice little set of uprights built under the arms of the PEEK shroud.
Some clever "bad code" seems to be used to ensure that the wanted part doesn't stick to the support structure too well (-:
Probably some combination of timing and THIN extrusion, i.e. build the supports, leave a THIN top edge, and don't come back to build the part at that location for a while to ENSURE delamination ?
It also filled the large circular air flow holes with a "waffle" that breaks away very easily.
Re: Fan shrouds - size of fan openings ?
I may have "solved" this, more by happenstance than anything.
I became fascinated with the subject of "heat spreaders".
I didn't have any reason to believe I needed one, but it seemed like a "good thing to have".
The idea of copper, 1/4 inch aluminum plate, etc looked interesting, but THICK would mean recalibrating everything, so I tried a sheet of aluminum foil, (hopefully "negligible" thickness).
Can't say it made anything any WORSE, but I could see through the glass that it wasn't staying uniformly stuck to the glass the way it was when first squeegeed down.
Next I tried some "trim coil", this is painted white aluminum that is used to encase wood trim when houses are vinyl sided, I had some left overs.
Not sure how thick this is, but my judgement said I would have to at least set up Z-max again.
OK, long story made even longer;
In checking the scripts I found one that was missing a minus sign.
I thought I had copy/pasted the G-code from the manual - perhaps not on THAT one.
As always, I didn't take good notes of WHICH value it was in WHICH of the scripts )-;
I did the end stops thing, the shroud now comes out with a fan cavity that my fan will just squeeze into - VERY TIGHT, but it goes in without a hammer.
Re: Fan shrouds - size of fan openings ?
The file that Guanu pointed to WORKS PERFECTLY if merely copy/pasted into the G-Code editor.
Now I am faced with the tasks of;
a) learning G_Code to a level where I can troubleshoot the code generated by the current version of slic3r
b) back grading the version of slic3r to see if earlier an version will produce the same code as the file that Guanu referenced.
c) trying to figure why Cura produces bad parts.
d trying to get Repetier_Host to use Cura 14.07
I have tried Matter Control; no better and I can't preview the G_Code unless I export it out to a file and open that with a text editor.
I "like" the animation that Repetier shows as prints are made, though I might grow tired of that... Eventually !
Re: Fan shrouds - size of fan openings ?
Do your Slic3r settings match those of the manual exactly?
The settings in the .gco file are close if not exactly the same as what is in the manual.
You can manually update your Slic3r settings by following the preamble description in the fan gcode file.
The only thing I would change is the filament diameter - it should correspond to the average diameter that you worked out by testing 3M of filament using a caliper.
g.
The settings in the .gco file are close if not exactly the same as what is in the manual.
You can manually update your Slic3r settings by following the preamble description in the fan gcode file.
Code: Select all
; generated by Slic3r 0.9.10b on 2013-09-25 at 14:50:08

; layer_height = .2
; perimeters = 1
; top_solid_layers = 5
; bottom_solid_layers = 5
; fill_density = .2
; perimeter_speed = 30
; infill_speed = 30
; travel_speed = 200
; nozzle_diameter = .5
; filament_diameter = 1.75
; extrusion_multiplier = 1.0
; perimeters extrusion width = 0.60mm
; infill extrusion width = 0.60mm
; solid infill extrusion width = 0.60mm
; top infill extrusion width = 0.60mm
; first layer extrusion width = 0.60mm
g.
Delta Power!
Defeat the Cartesian Agenda!
http://www.f15sim.com - 80-0007, The only one of its kind.
http://geneb.simpits.org - Technical and Simulator Projects
Defeat the Cartesian Agenda!
http://www.f15sim.com - 80-0007, The only one of its kind.
http://geneb.simpits.org - Technical and Simulator Projects
Re: Fan shrouds - size of fan openings ?
Thanks Gene, I got this last night;
; generated by Slic3r 1.1.6 on 2014-07-31 at 14:16:56
; perimeters extrusion width = 0.45mm
; infill extrusion width = 0.45mm
; solid infill extrusion width = 0.45mm
; top infill extrusion width = 0.40mm
G21 ; set units to millimeters
M107
G28
M104 S225
M190 S90
M109 S225
; BEGINNING OF HEAD MOVEMENT WARNING TONES
M120 S4 P10
G4 P40
M120 S4 P10
G4 P40
M120 S4 P10
G4 P40
M120 S4 P10
G4 P40
M120 S4 P10
G4 P40
M117 KEEP HANDS AWAY
G4 S3
; END OF HEAD WARNING TONES
G90 ; use absolute coordinates
G92 E0
M82 ; use absolute distances for extrusion
G1 F6000.000 E-5.40000
G1 Z0.550 F12000.000
G92 E0
G1 X14.698 Y-12.925 F12000.000
G1 Z0.350 F12000.000
=====================================
BTW, I was wondering about the average diameter arithmetic.
Picky, picky, picky, but shouldn't it be root mean square ?
{hypothetical, within the likely range it likely makes no practical difference}
-
jeffhuber
- Printmaster!
- Posts: 146
- Joined: Sun May 25, 2014 11:04 pm
- Location: San Francisco
- Contact:
Re: Fan shrouds - size of fan openings ?
As a quick and dirty solution.
PEEK Fan Shroud - I had to file mine down extensively to get the fan to fit.
Layer Fan - I printed at 1.04 scale (+4% to get the fan to fit)
Not the best solution, but got me in business.
PEEK Fan Shroud - I had to file mine down extensively to get the fan to fit.
Layer Fan - I printed at 1.04 scale (+4% to get the fan to fit)
Not the best solution, but got me in business.
Rostock max v2 with e3d v6