First Build frustrations grow
First Build frustrations grow
It seems like if it's not one thing, it's another. I spent two hours calibrating the machine and printed the fan shroud and it came out brilliantly! Now, I've hooked up the fan shroud(my nozzle looks crooked which I imagine will be fun to calibrate) and now the fan isn't working. I understand the "coolness" of having a piece printed by your machine for your machine, but I'm going through the hassle of disassembling, undoing work I've done and now it isn't working properly. I hope in the next iteration of this machine, they ship it with all the parts you need, and let the folks who want to customize and add-on mods to the machine, print the pieces they want. I've spent well over 20 hours on this machine and still not ready to print.

Re: First Build frustrations grow
Did you figure out what was wrong? What I would have done was run a wire pair along the arms until I felt like actually making it really purty. Right now I have a PVC pipe supporting the water cooling lines and wiring for my Kraken hotend 
Re: First Build frustrations grow
check the G code and make sure you see this (m42 s255 p6) this is what turns on the peek fan. and make sure you have it pluged into the right spot 
http://www.youtube.com/user/aonemarine" onclick="window.open(this.href);return false;
Lost pla castings? see me
Lost pla castings? see me

Re: First Build frustrations grow
I wouldn't tear the machine apart to troubleshoot a fan issue. First, did you mark the set of wires used for the peek section? if not then you could have them mixed up with the layer fan.
Also, do what was mentioned above in regards to running a temporary set of wires just to make sure you don't have a defective fan or somethings wrong with the crimp/solder job.
As for printing the shroud or having it provided for you, that wouldn't change the fact that your fan doesn't work and you still need to troubleshoot the issue. and believe me, this wont be the last time you tinker with your machine
Re: First Build frustrations grow
The point behind the fan shroud is to have you learn about the machine.
g.
g.
Delta Power!
Defeat the Cartesian Agenda!
http://www.f15sim.com - 80-0007, The only one of its kind.
http://geneb.simpits.org - Technical and Simulator Projects
Defeat the Cartesian Agenda!
http://www.f15sim.com - 80-0007, The only one of its kind.
http://geneb.simpits.org - Technical and Simulator Projects
Re: First Build frustrations grow
DavidF wrote:check the G code and make sure you see this (m42 s255 p6) this is what turns on the peek fan. and make sure you have it pluged into the right spot
Where would I look to find this?
Re: First Build frustrations grow
KAS wrote:I wouldn't tear the machine apart to troubleshoot a fan issue. First, did you mark the set of wires used for the peek section? if not then you could have them mixed up with the layer fan.
Also, do what was mentioned above in regards to running a temporary set of wires just to make sure you don't have a defective fan or somethings wrong with the crimp/solder job.
As for printing the shroud or having it provided for you, that wouldn't change the fact that your fan doesn't work and you still need to troubleshoot the issue. and believe me, this wont be the last time you tinker with your machine
All of the fans were marked and I've just double checked the wiring go down. I guess this is why one guy said it's a good idea to test everything and test power before building up the whole machine. I don't know if I have any spare wires to test the fan, but I'm guessing the fan. I've already had a failed power supply.
Re: First Build frustrations grow
I have continuity between the wires, so I'm guessing it's a bad fan. Is this a fan I can pick up at RadioShack?
-
Mac The Knife
- ULTIMATE 3D JEDI
- Posts: 1407
- Joined: Sun May 11, 2014 6:18 pm
Re: First Build frustrations grow
Nope. And I would suggest getting a ball bearinged version. The bushed fans don't seem to last long.
R-Max V2
Eris
Folger Tech FT-5 R2
Eris
Folger Tech FT-5 R2
-
Mac The Knife
- ULTIMATE 3D JEDI
- Posts: 1407
- Joined: Sun May 11, 2014 6:18 pm
Re: First Build frustrations grow
This is what I've replaced mine with,,,, and it is still quiet, and working. http://www.ebay.com/itm/170764022133
R-Max V2
Eris
Folger Tech FT-5 R2
Eris
Folger Tech FT-5 R2
Re: First Build frustrations grow
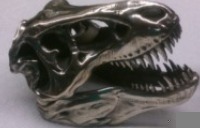
The wire looked pinched due to the tight fit. I stripped the wire and plugged it directly into Rambo and voila. Heading to pick up a fan now. My fan shroud appears to have a slight angle to it. Like gradually as it printed it shifted to the right. Could this be because the horizontal radius is off?
- Attachments
-
Re: First Build frustrations grow
not sure the horizontal radius would cause that with a small print in the center, but definitely and overall calibration issue with most likely tower alignment in my opinion.