Hey guys-
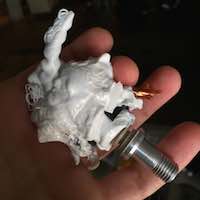
details: all stock Rostock Max v2, white PLA, kapton tape and gluestick on borosilicate
I am going to print this boat for a client. The object will be 50 cm in length, so I am planning on printing it in two parts. I am wondering how you guys would slice it / orient it for the print. If it weren't for the little detail at either end I would say print it in 2 pieces upside down... and maybe that is still the way to go. Perhaps those little loops can be printed separately and glued on after the fact. In this scenario, perhaps vertically oriented halves would make for a cleaner seam. Any thoughts / advice is greatly appreciated.
-Revel
advice on printing a large print
advice on printing a large print
- Attachments
-
-
-
-
lightninjay

- Printmaster!
- Posts: 288
- Joined: Sun Jul 13, 2014 12:49 am
- Location: Tampa, Florida
Re: advice on printing a large print
If it makes any sense, why not BOTH techniques? You could print the parts vertically in half, and so as to avoid an inordinate amount of support (that would likely fall over without good adhesion) remove the little ring bits and glue them on later since you have to assemble the boat/canoe after printing anyway.
If at first you don't succeed, you're doing something wrong. Try again, and if it fails again, try once more. Through trial and error, one can be the first to accomplish something great.
Re: advice on printing a large print
Yes, that is what I am leaning toward- Hull parts vertically, and top rims horizontally.
Re: advice on printing a large print-Settings
I've got this sliced up in Netfabb thanks to the guys over at Sketchucation and am printing the hull parts vertically and the top rims horizontally as mentioned. Right now my hull part print time is 11hr. I've started printing one as I write this. I would really appreciate any advice on the various parameters and settings I've listed below, or any other pertinent ones. One concern I have is that the infill seems jerky, and I feel the printer may rattle itself out of tolerance over time.
Details:
SeeMeCNC Arctic White PLA
Extruder temp: 218
bed temp: 60
Layer height: .2mm
1st layer: .3
Perimeters: 2
Layers on top and bottom: 3
fill density: .3
Speed:
infill: 40mm/s
inside perimeters:45 mm/s
outside perimeters: 35 mm/s
bridge: 60 mm/s
non print speed: 300 mm/s
Any and all advice very appreciated,
-Rev
- Attachments
-
Re: advice on printing a large print
Print went well. Top is a little fuzzy on account of the print head moving off to the side to let the part cool when layer time is under x. How do I keep it from getting stringy in this mode? Horizontal z banding is still more prevalent then I would like. would magnetic ball arms upgrade help solve this? Resonance / vertical Z banding is also an issue. Would motor dampers help this I wonder?
- Attachments
-
-
-
Jimustanguitar

- ULTIMATE 3D JEDI
- Posts: 2608
- Joined: Sun Mar 31, 2013 1:35 am
- Location: Notre Dame area
- Contact:
Re: advice on printing a large print
Ha! No-- that seems like it concerns a different set of problems- displacement, center of gravity, the volume of the water displaced times the density of water times the acceleration of gravity, etc.
If I were concerned with such matters as floatation, I certainly would not be worried about small surface variations in the vessel, unless I was designing a speed boat
This is a maquette that is going to be scaled up 10x and hand carved out of marble. So I am interested in getting as smooth a surface as is reasonable, because the scaling (and thus the carving) will be done using old school analog techniques. I know I am not the only person interested in nice smooth artifact free surfaces
The pictures below show the Z banding and resonance that I am trying to remedy. I've lit it with a sort of chiaroscuro lighting to exaggerate the surface.
- Attachments
-
-
-
stonewater
- Printmaster!
- Posts: 345
- Joined: Mon Jan 06, 2014 1:24 am
Re: advice on printing a large print
I have noticed that vertical banding like that isa due to mechanical defects in the printer path, things like loose cheapskates, loose arms and a loose extruder. I solved most of my problems with my tricklaser arms. what that did is force me to look at all mechanical aspects of the printer. I discovered one of my arms was binding on the metal axle. you have a V2 so you may have a loose arm, or perhaps the nut on your hotend is a bit loose. look for the obvious first. then the more difficult stuff.
I also measure my filament each time I do a large print to make sure that its consistent. also have you made sure that 100 mm of filament is really 100 mm of filament coming out of the extruder motor?
my 1/2 cent
Tom C
I also measure my filament each time I do a large print to make sure that its consistent. also have you made sure that 100 mm of filament is really 100 mm of filament coming out of the extruder motor?
my 1/2 cent
Tom C
MAX V1
325 MM carbon arms trick trucks effector mount LED ring heat spreader
Corvair750
V6 Hotend
Robo 3D
Flashforge creator
http://WWW.TeslagenX.com" onclick="window.open(this.href);return false; - Bedini experimenter kits, books, DVD's
325 MM carbon arms trick trucks effector mount LED ring heat spreader
Corvair750
V6 Hotend
Robo 3D
Flashforge creator
http://WWW.TeslagenX.com" onclick="window.open(this.href);return false; - Bedini experimenter kits, books, DVD's
Re: advice on printing a large print
Sand it lightly and then do a acetone vapour polish.
That will make it looking like glass.
That will make it looking like glass.
When on mobile I am brief and may be perceived as an arsl.
Re: advice on printing a large print
Thanks for the advice-stonewater wrote:I have noticed that vertical banding like that isa due to mechanical defects in the printer path, things like loose cheapskates, loose arms and a loose extruder. I solved most of my problems with my tricklaser arms. what that did is force me to look at all mechanical aspects of the printer. I discovered one of my arms was binding on the metal axle. you have a V2 so you may have a loose arm, or perhaps the nut on your hotend is a bit loose. look for the obvious first. then the more difficult stuff.
I also measure my filament each time I do a large print to make sure that its consistent. also have you made sure that 100 mm of filament is really 100 mm of filament coming out of the extruder motor?
my 1/2 cent
Tom C
Yea I'm due for an upgrade I think. I'll look at all connections etc. Overall however I think the printcame together quite well. I would have sliced it a little differently, but other than that I'm fairly happy with the result, as is the client.
I glued it with a loctite general purpose plastic adhesive. I heard that loctite 401 is preferable but couldn't find it. I'm intrigued as well with friction welding it in places using a dremel.
- Attachments
-