Hello all,
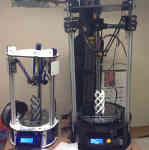
I recently received the Orion Delta printer and I love the look and design of this hardware. I moved on from a Printrbot Simple, so I'm in new territory with the Delta series. Earlier today I went through the "Setting the Z height" instructions and during the "Home All" step, the carriage moved up as expected, however when the a axis end stops are depressed by the carriage, the carriage doesn't stop and runs into the top of the tower.
I suspect that, because I had manually moved the carriage to the top (during the removal of the plastic wrap), this would be the obvious case. However after performing the "Z Pos Fast" step, then the "Home All" step, I still get the runaway carriage effect.
Should I have the carriage not set to the top of the tower for the Home All step? With the Printrbot Simple, I'm used to moving the carriage to zero, manually typing the G28 command and then start the slicing/printing.
Thank you very much in advance
-Ryan
Orion z axis end stop not stopping carriage
-
802printer
- Plasticator
- Posts: 7
- Joined: Fri Jan 03, 2014 4:55 pm
Re: Orion z axis end stop not stopping carriage
Where the printer starts from should not effect the homing at all. My first guess is that for some reason the end stop are not working as expected. If you download the Rostock Max manual (not the Orion) there is a test to follow to see if your endstops are working correctly. It's a simple test and probably worth doing given your symptoms.
PTMNBN="Printer that must not be named" - a heavily upgraded Replicator 2
Re: Orion z axis end stop not stopping carriage
make sure the 2 wires are still connected to that end stop as well
-
802printer
- Plasticator
- Posts: 7
- Joined: Fri Jan 03, 2014 4:55 pm
Re: Orion z axis end stop not stopping carriage
And wouldn't you know, I went to look at all three end stops and one of them was missing the metal lever! Short of ordering a replacement end stop, is there an alternative solution/hack to fix the end stop? I looked on seemecnc's shop, but I didn't see replacement end stops listed under Electronics. A quick Google search brought up these (http://www.cooking-hacks.com/end-stop-for-3d-printer). I assuming the forementioned link is a generic enough part to swap out (or even steal the metal spring off of)?bubbasnow wrote:make sure the 2 wires are still connected to that end stop as well
Re: Orion z axis end stop not stopping carriage
If the switch was damaged in shipping, I'd contact SeeMeCNC directly to get a replacement.
g.
g.
Delta Power!
Defeat the Cartesian Agenda!
http://www.f15sim.com - 80-0007, The only one of its kind.
http://geneb.simpits.org - Technical and Simulator Projects
Defeat the Cartesian Agenda!
http://www.f15sim.com - 80-0007, The only one of its kind.
http://geneb.simpits.org - Technical and Simulator Projects
-
802printer
- Plasticator
- Posts: 7
- Joined: Fri Jan 03, 2014 4:55 pm
Re: Orion z axis end stop not stopping carriage
Thanks Gene, I have submitted a support request to SeeMeCNC. It's a shame I wasn't able to use it right away, but in due time I'll be able to fire this printer up and print some big things.
-Ryan
-Ryan
-
802printer
- Plasticator
- Posts: 7
- Joined: Fri Jan 03, 2014 4:55 pm
Re: Orion z axis end stop not stopping carriage
Latest update (sorry for the very long delay),
So after a few (long delayed) attempts of trying to get the soldering iron up and running again, the iron never got hot enough to melt the solder and make the proper connections with the end-stop and the wires. Is there another way of reconnecting the wires to the replacement endstop, without the use of soldering? I'm in the process of RMA'ing the soldering iron (I bought the iron while waiting for the replacement end-stops), however I would like to try and get the Orion printing this weekend, and actually print my first item.
Would electrical tape even work with these mechanical switches? I feel kinda stupid for buying this printer and then not having been able to try it out. Any suggestions?
Re: Orion z axis end stop not stopping carriage
Electrical tape is not for making electrical connections, it's for protecting and preventing accidental contacts with everything else.
For a purely temporary fix, small alligator clip jumper wires would probably do the trick.
Although you could just run out and buy a cheap soldering iron. Good ones are nice, but the $5 types do actually work for little things like this.
For a purely temporary fix, small alligator clip jumper wires would probably do the trick.
Although you could just run out and buy a cheap soldering iron. Good ones are nice, but the $5 types do actually work for little things like this.
Last edited by Eric on Sat Feb 01, 2014 3:52 pm, edited 1 time in total.
Re: Orion z axis end stop not stopping carriage
insulated butt splice connectors is a decent replacement for soldering
-
802printer
- Plasticator
- Posts: 7
- Joined: Fri Jan 03, 2014 4:55 pm
Re: Orion z axis end stop not stopping carriage
If the former RadioShack location in my town was still in business, I'd run over and get another soldering iron, but they haven't been in business for quite a while. I had to buy this last soldering iron online, and "you get what you pay for". I'll look around on Amazon and see if they have any good quality irons.Eric wrote:Electrical tape is not for making electrical connections, it's for protecting and preventing accidental contacts with everything else.
For a purely temporary fix, small alligator clip jumper wires would probably do the trick.
Although you could just run out and buy a cheap soldering iron. Good ones are nice, but the $5 types do actually work for little things like this.
I haven't tried an insulated butt splice connector, but I'll take a look at the nearest hardware store and see what they have.
-
802printer
- Plasticator
- Posts: 7
- Joined: Fri Jan 03, 2014 4:55 pm
Re: Orion z axis end stop not stopping carriage
So finally after attempting to install an insulated butt splice connectors and a new soldering iron, I still cannot make good contact with the wires, solder, and the end-stop switch. The solder (60/40 Rosin Core) never seems to melt enough to have good adhersion, and the butt splice didn't make a good enough connection, after crimping and heat shrinking.
Short of sending it back to SeeMeCNC HQ and have them repair it (if it is even an option), any other ideas? I thought soldering was supposed to be easy (it was when I was in school), but it's like the tight space between the vertical post/mounting tabs, the small wires, the small tabs on the end-stop switch and ultimately inexperience with a soldering iron, are working against me *face palm*
Lesson learned, next time open the package in front of UPS, before they leave...
-
Eaglezsoar

- ULTIMATE 3D JEDI
- Posts: 7159
- Joined: Sun Apr 01, 2012 5:26 pm
Re: Orion z axis end stop not stopping carriage
Don't you have a friend that is good at soldering who could help you out?
-
802printer
- Plasticator
- Posts: 7
- Joined: Fri Jan 03, 2014 4:55 pm
Re: Orion z axis end stop not stopping carriage
I bought this soldering iron (as a replacement to the first one), thinking it would be the right one for the job, but even this one does not heat up the 60/40 solder enough to make the connection. I had it set to 300C and no dice.Eaglezsoar wrote:Don't you have a friend that is good at soldering who could help you out?
http://www.amazon.com/Soldering-Station ... ering+iron
I asked a bunch of my buddies, but they refused to even touch this printer. *shrug* I'll have to wait and see what Support could offer, to finally get this printer up and running. I swear 3D Printing is not what I thought it was going to be. I figured it was supposed to be more fun and exciting (especially after reading some of the "What are you making?" threads), but alas this little snag has me regretting the purchase.
Re: Orion z axis end stop not stopping carriage
might i recommend watching a youtube video on how to solder wires.
Heat the soldering iron and melt a small bit of solder to it, then with a damp paper towel wipe it off. Slide the two wires together (no twisting) and heat the wires for a minute with the soldering iron, then touch the solder to the iron and then move to the top of the wires with the solder while holding the iron underneath it, the solder is drawn to the heat...Its not that difficult, but you may want to practice some on some scrap wire.
Whats your location? might be a local printer near by that is willing to help...
http://www.youtube.com/user/aonemarine" onclick="window.open(this.href);return false;
Lost pla castings? see me
Lost pla castings? see me
-
Eaglezsoar
- ULTIMATE 3D JEDI
- Posts: 7159
- Joined: Sun Apr 01, 2012 5:26 pm
Re: Orion z axis end stop not stopping carriage
If that soldering iron won't melt the solder then something is wrong with the solder you have.
First of all, 60/40 solder melts at 370 °F or 188 °C. You want a small diameter solder, not the 1/8" stuff they sell.
A good solder for general electronics work is here: http://www.radioshack.com/product/index ... id=prod_cs
The tip of the iron must be clean and tinned. Tinned means that the iron has a coating of solder on the tip.
You hold the tip on the part to be soldered for a few seconds then touch the part with the solder, it should melt almost instantly.
I understand your anger over the fact that your Orion was damaged in shipping but the repair should be relatively simple. If soldering
is a skill you don't have then practice on some stranded wire or something until you get the feel for how to do it.
To spend the money required to ship it back for repair because of a wire that needs soldered, never mind you do not want my opinion.
I still recommend practicing with the new soldering iron and if the solder is to thick, buy a very small diameter rosin core solder.
If you absolutely can't get it soldered, you could take it to a local shop that repairs televisions and radios and have them solder it for you.
Best of luck getting it repaired.
Re: Orion z axis end stop not stopping carriage
Work on getting solder to melt to the soldering iron first...called tinning, like Eagle said. No point in trying anything else if you can't do that.
Then work on "tinning" some scrap wire ends...which simply means melting some solder into them. If you've got that down, tin the ends of your switch wires.
Then try to tin a tab on the switch, getting some solder to flow on at least one side of the tab. Remember, the main idea isn't to melt the solder directly, it's to heat up the tab until IT is hot enough to melt and bond with the solder.
Now that everything has solder on it, soldering the wire to the hot tab will likely be a lot easier.
There are a lot of soldering tutorials on the web if you need visuals.