Not really delta related but still a cool build.
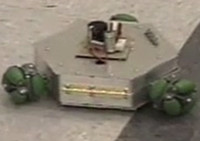
Recently i came across an amazing deal on a Stratasys SST printer. The problem is i have never had or used a 3d printer before and my coding experience is limited but still generally above par (or so id like to believe). I have about 2 years experience the Google Youtube 3D Printing University so my approximate knowledge of the situation is vast but unhelpful.
http://i.imgur.com/lltymrr.jpg
Problem is, they took out some of the juju that runs it. So i improvised and ordered a rambo 1.2a from amazon.
http://imgur.com/w4dbxpG
The stepper motors are 8 lead steppers with your standard 4 wires coming up for the top and the bottom coils. Even through i am able to put alot more juice in these steppers they wont be much of an upgrade from nema 17s with my setup. (if even possible)
http://imgur.com/jQBwvRK
Which leads me to my first problem my steppers dont move or even tighten when connected to the board. Which makes me beleive my 12 volt power supply is the problem (i dont have the confidence to hook up the powersupplys left in the machine)
http://i.imgur.com/SybHbad.jpg
The rambo board has repetir firmware and connected to repetir host on the computer on it (i somehow bricked it and figured outish how to re program it real fast). The next thing i want to connect is the heated chamber and lights and fans.
http://i.imgur.com/xq4eABY.jpg
Theres 4 fans total with revered plastic blower thinggies and polarity protection to make sure the air goes through properly. And 2 heated thinga ma nigs on each side of the chamber. I have a budget of about $500-800ish more dollars to make this thing put out some low quality dental floss and was thinking of wiring all the fans/heated chamber separately. So any help in pointing me in the right direction to make this thing print at least air would be greatly appreciated. There is still a lot more going on in this printer that i haven't gotten to yet. (possibly provide some inspiration for your own diy project).
All the options and do hickeys in this thing to fine tune prints are are nice and all but my first goal is to at least make the stepper motors twitch.
The ultimate hardware kit
Re: The ultimate hardware kit
Link to the reddit post also http://www.reddit.com/r/3Dprinting/comm ... it_part_2/
and some pictures my friend took of the steppers, chamber fans and max end stop for those curious.
https://fbcdn-sphotos-h-a.akamaihd.net/ ... 4b3cf6895a
https://fbcdn-sphotos-h-a.akamaihd.net/ ... 52684e0f72
https://fbcdn-sphotos-h-a.akamaihd.net/ ... 5b2e183b7d
https://fbcdn-sphotos-h-a.akamaihd.net/ ... fbc059d4c2
Last edited by Tkoz on Mon Feb 16, 2015 5:45 pm, edited 1 time in total.
Re: The ultimate hardware kit
So many unknowns at once.
On the stepper motors...have you mapped the wires to the coils correctly? The resistance of each pair should be the same.
Also, the resistance value should give you and idea of voltage requirements. If you're really lucky, googling the numbers on the steppers will get you to a data sheet, sometimes even with wire colors.
Now that you know which wires are for which coils are, have you wired them correctly?
Removing the stepper from the machine, or at least disconnecting the belt/linkage will likely make the motor a lot easier to test. Put a piece of tape on the shaft so you can see motion.
On the rambo...what are you using for testing software? Are you sure the software is configured correctly enough to be working? Do you have any known-good steppers to test it on?
Power supply...the fan you pictured is 24V, so I'd try that if you have it.
Re: The ultimate hardware kit
I am able to identify the pairs for the coils but not which are top and bottom. I do have an ancient 6 lead stepper motor out of a laserjet printer. I was able to id the center coil leads, but was not able to get that moving with the board. Ill post some more pictures and screenshots of the host software first chance i get.
Re: The ultimate hardware kit
Top and bottom???Tkoz wrote:I am able to identify the pairs for the coils but not which are top and bottom. I do have an ancient 6 lead stepper motor out of a laserjet printer. I was able to id the center coil leads, but was not able to get that moving with the board. Ill post some more pictures and screenshots of the host software first chance i get.
On a stepper you don't care as long as you can find the ends of the two coils. Hook them up, and if it goes backwards, just swap the two coils.
Although I just had an interesting bad stepper. Bipolar center tap. No matter how I hooked it up, it just sat and wiggled . i ohmed it out, and one leg of one coil was burnt out (open). So I just switched to using the other leg and the center tap for both coils. That effectively halves the voltage of the stepper
Re: The ultimate hardware kit
After hitting my first brick wall with the stepper motors. I got rid of the xbox power supply and moved on the ones already inside the machine. 2 of the 3 PSU's connected and all the fans + lights i have available in the machine. I plan on making a line filler box when i add the 240v PSU for the chamber/extruder heaters. Originally i wanted to go to the department store and make the filler box out of sheet metal and screws. I wanted to explore a team collaboration for creating parts and i am able to invite people to the grabcad workbench for being an adopter. If you use solidworks PM me your email and ill toss you an invite link with max powers for those who want to play with it.
The box will have...
1. USB plugged into the rambo (or ramps, whichever i get working first)
2. Main Power (computer style plug in)
3. 12V 2A Fuse
4. 24V 6A fuse
5. 120V 3.15A fuse
6. Respective trouble shooting leds/Test points
Below is a picture of my "just get it working" power set up
http://i.imgur.com/gSOjmKj.jpg
http://i.imgur.com/6I3ektm.png
The lights/blowers are all direct independent power from the 24V PSU, and running a bit high but not worrysome. I plan on adding in line resistors to tune all the blower fans output even through it may not be necessary.
http://i.imgur.com/419ZaMq.jpg
http://i.imgur.com/15CeI3J.jpg
http://i.imgur.com/gfVuV0b.jpg
I reinstalled the original SBC and connected the LCD, hard drive and PSU but it did not budge when i flipped the switch. I am having trouble finding anything about this lcd. It would be nice to connect it to the rambo or ramps if possible.
http://i.imgur.com/nZD0Tdf.jpg
Moving on to the electronics, the thing that makes this a printer and not a heated brick with fans and lights.
http://i.imgur.com/xrkWYLA.jpg
Only the 12 volt is connected to the rambo using this diagram. i connected everything with the information i have at hand and my best guess for the stepper motors (each of the stepper lead pairs are isolated and connected to their respective pins but the position is a crap shoot)
http://www.geeetech.com/wiki/images/thu ... nn-all.jpg
(I hear the rambo board can go to 24v but im not so sure about this china made one the picture with 12v down the line for power input made me lose confidence in putting 24v into it.)
There are two types of temperature reading devicdes that normally have some sort of signel amplification. But today we are using electric tape for the chamber sensor which appears to be just a wire stick poking inside.
http://i.imgur.com/9yV7vlE.jpg
http://i.imgur.com/EyvIFb4.jpg
The other is a thermocouple and the only thing i know about that is the name, Thick as hell wires go into i and communicates with PWM.
Chamber
http://i.imgur.com/wiopCrT.jpg
http://i.imgur.com/04oCK0g.jpg
Extruder
http://i.imgur.com/H1fTKqp.jpg
http://i.imgur.com/OiXzltM.jpg
-
Eaglezsoar

- ULTIMATE 3D JEDI
- Posts: 7159
- Joined: Sun Apr 01, 2012 5:26 pm
Re: The ultimate hardware kit
I am glad that you got it working!